GoHighLevel is quickly becoming a major platform. It offers a solid suite of tools, including a website builder, lead forms, and a meeting booking system. However, tracking these forms is often challenging. This is mainly because the forms are embedded using iFrames. The difficulty increases significantly when you need to capture user input values for Enhanced Conversions.
To solve this, I’ve developed a simple yet powerful tracking code. This code integrates flawlessly with Google Tag Manager (GTM). Just follow the step-by-step guide below.
A quick note: I’m assuming you already have Google Tag Manager and Google Analytics properly installed on your website. If not, please start with the linked article.
👉 Step-by-Step Guide: How to Integrate Google Tag Manager & Google Analytics with a Standard Website
👉 Step-by-Step Guide: How to Integrate Google Tag Manager and Google Analytics with GoHighLevel?
What You Will Learn
DateLayer Integration
To track GoHighLevel form submissions, we first need to integrate the dataLayer with some JavaScript code in Google Tag Manager. This will allow us to listen for form submissions and capture user data such as email, name, and phone number.
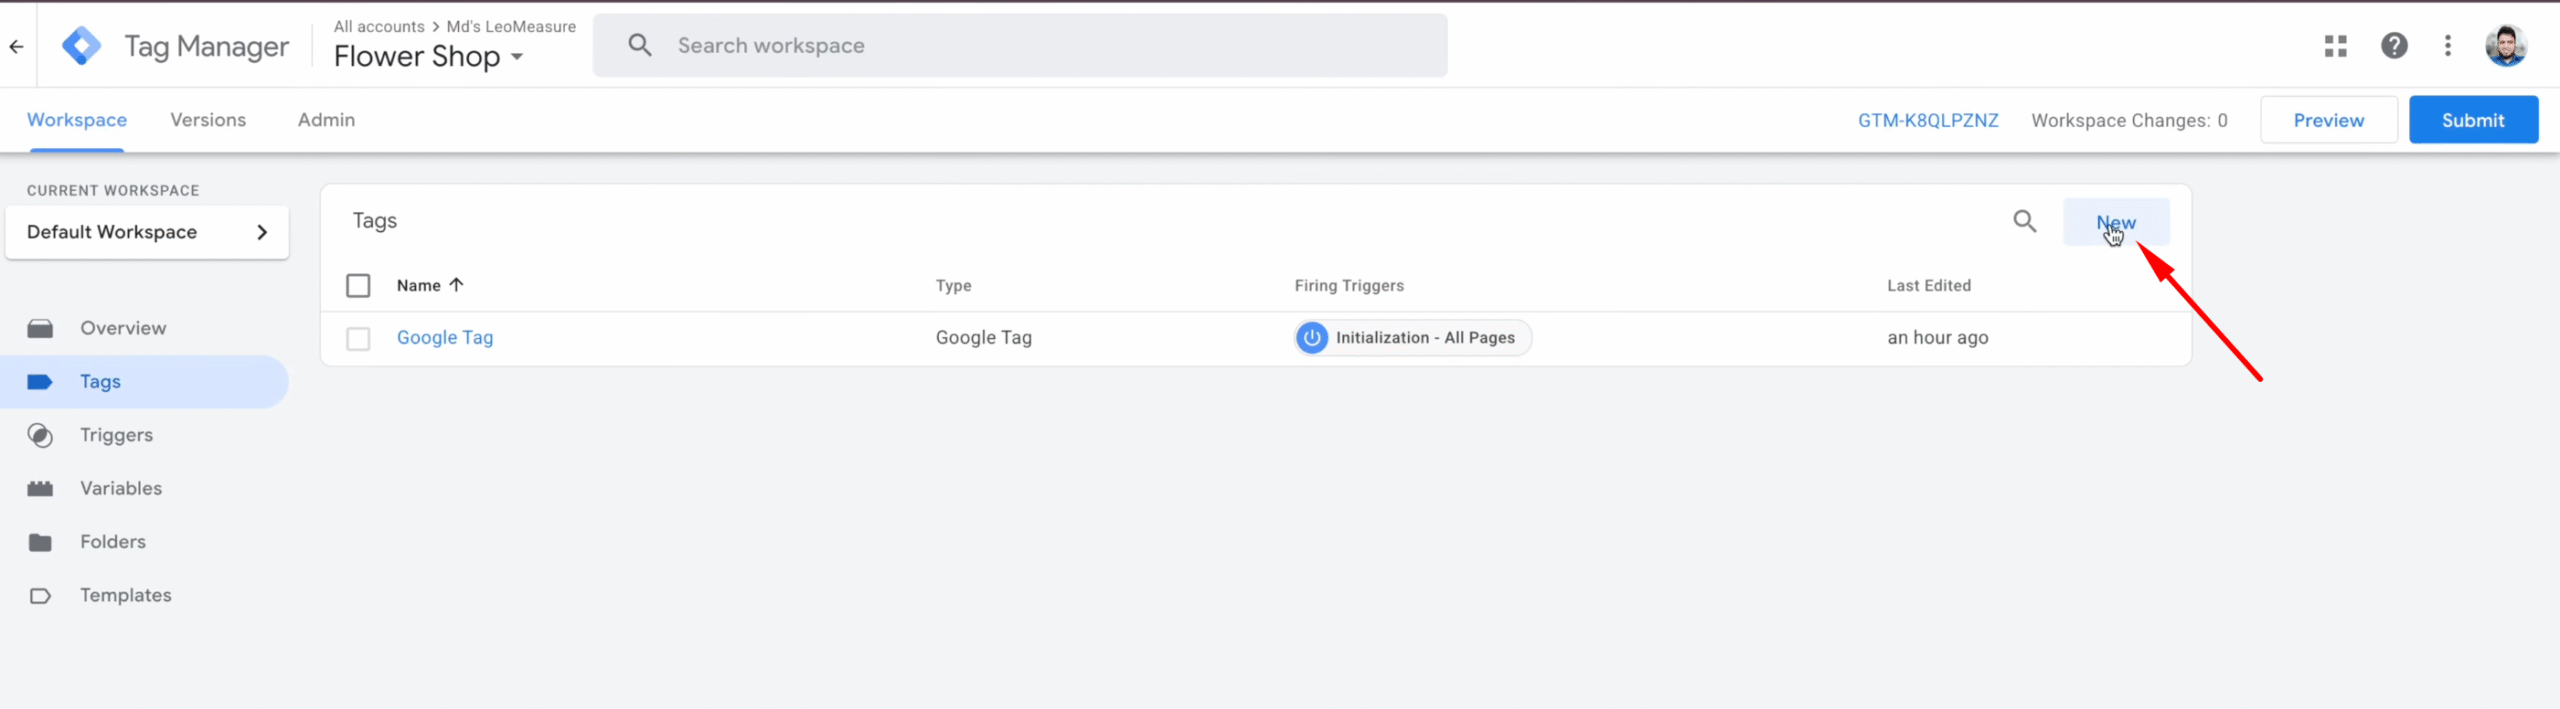
Step 1: Create New HTML Tag
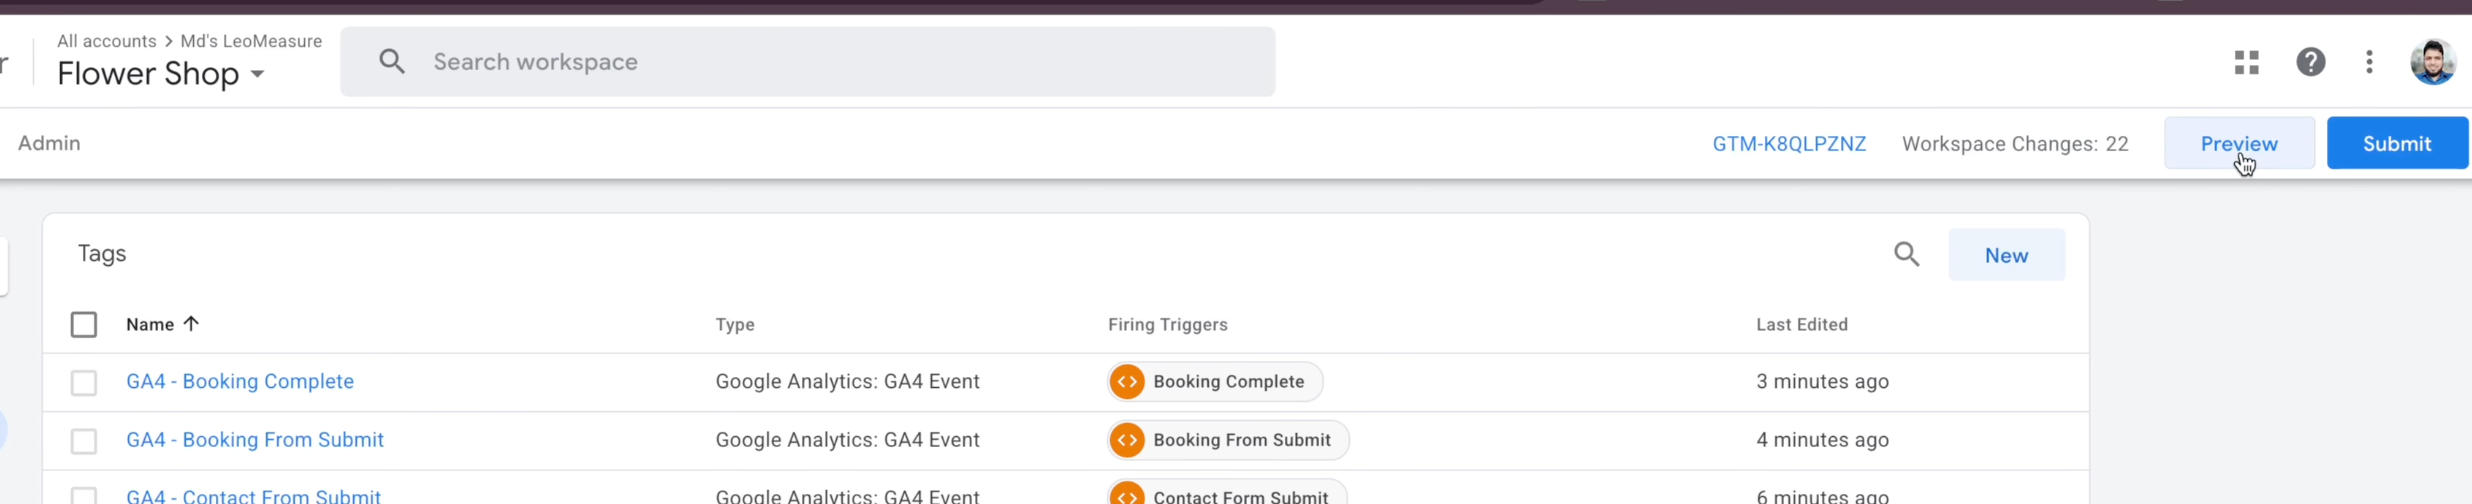
Form your google tag manager go to Tags section and create a new tag as following screenshot.
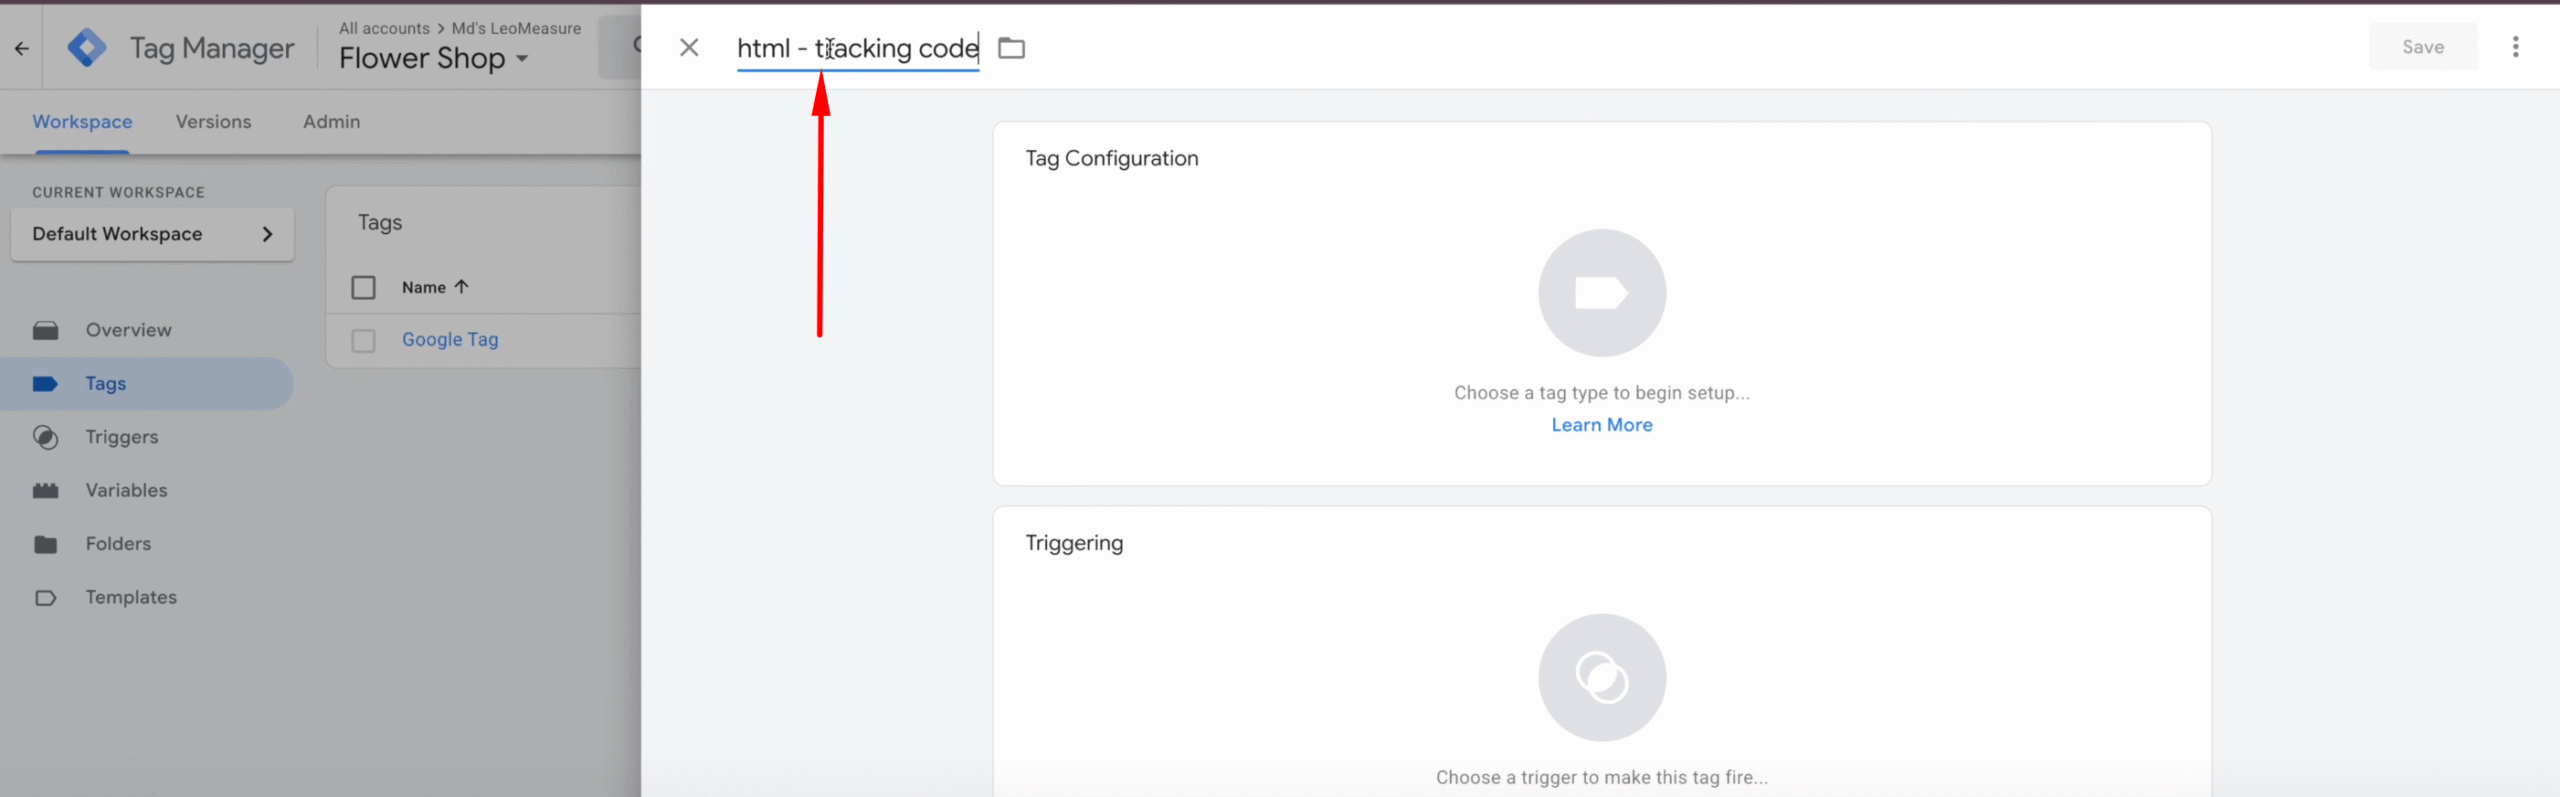
And give a title for the tag as following.
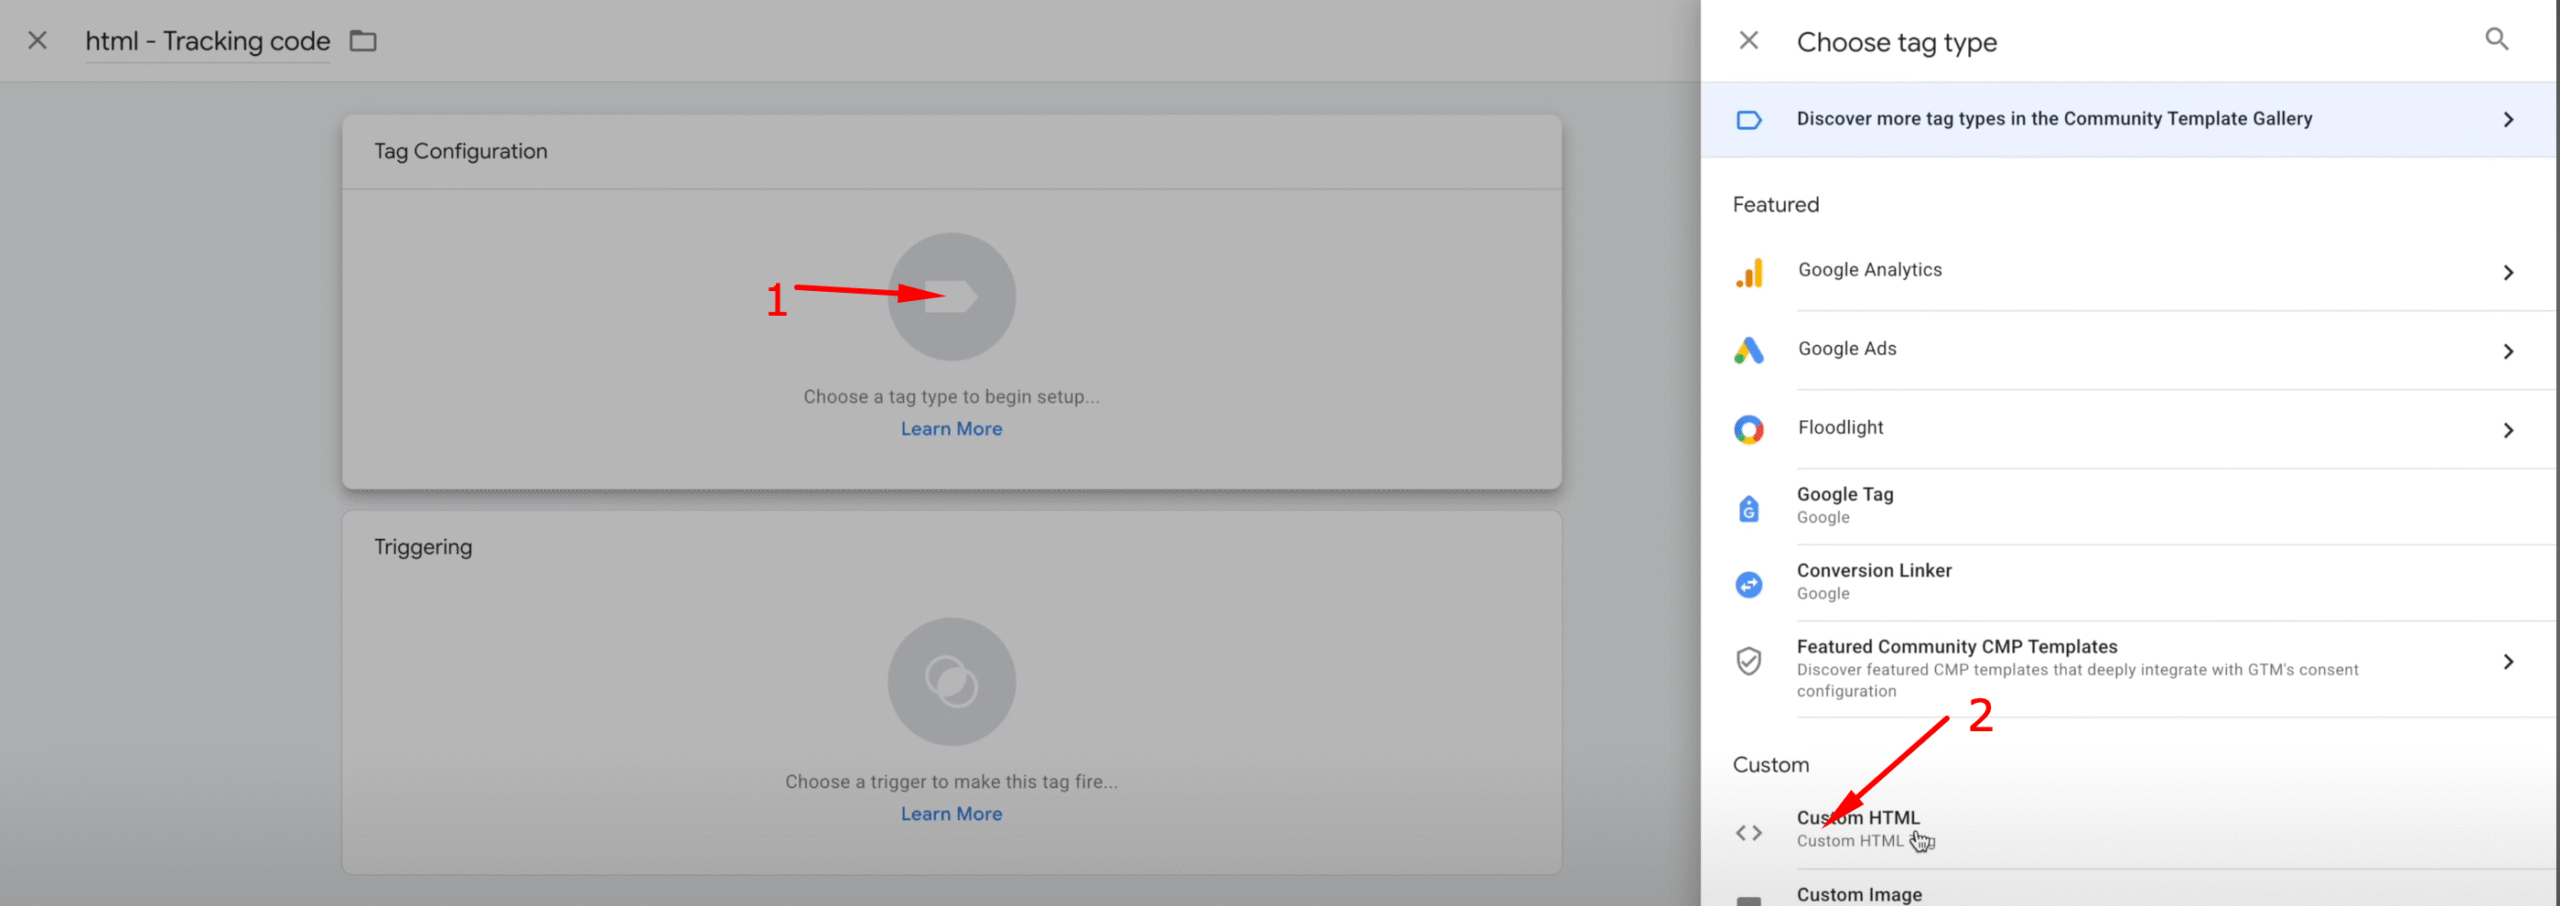
Click tag configuration area and choose “Custom HTML” tag like following screenshot.
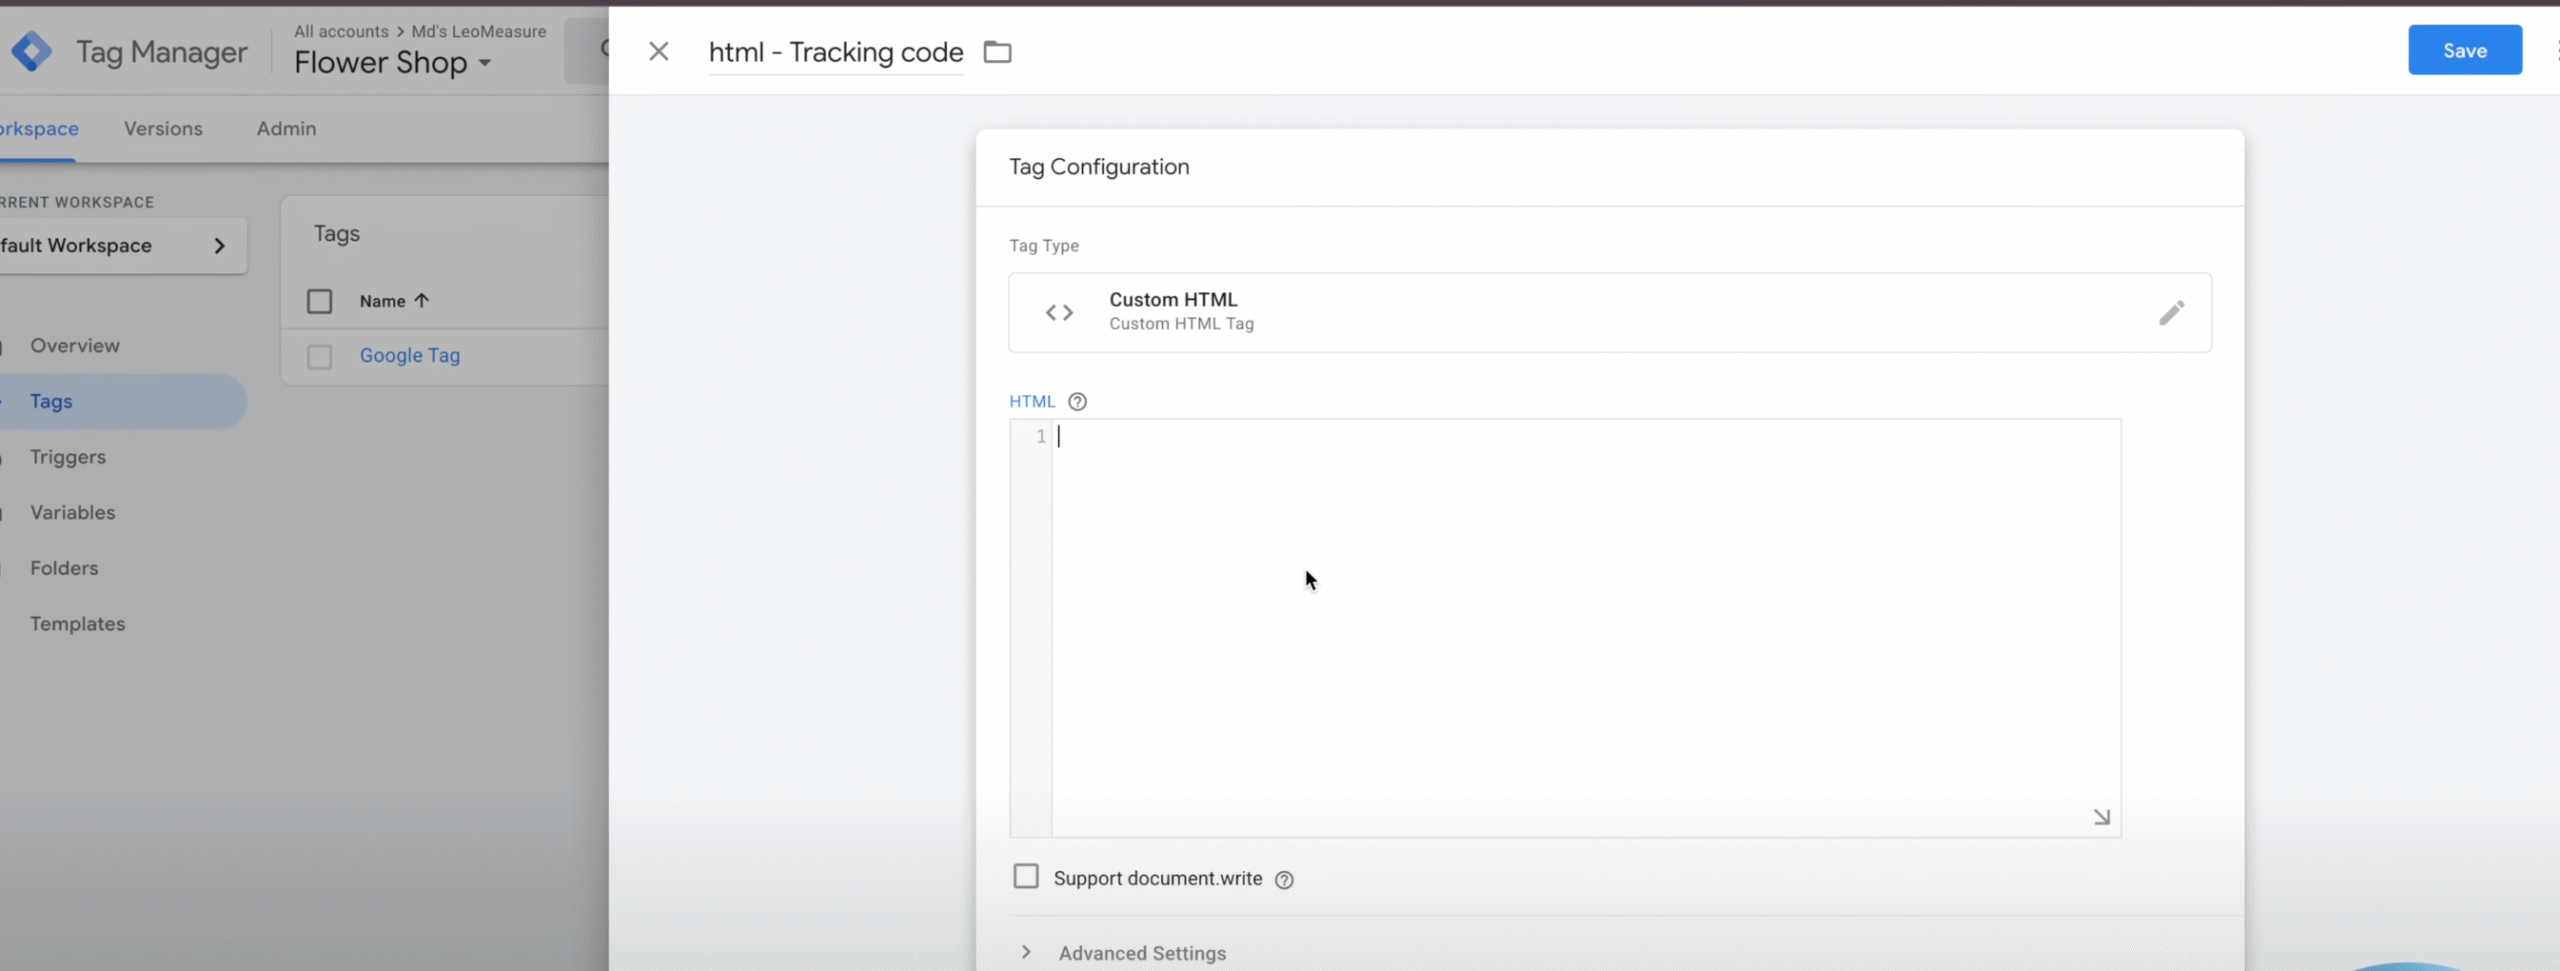
Step 2: Insert Tracking Code
Copy the following code and paste it into the HTML field as shown in the screenshot below.
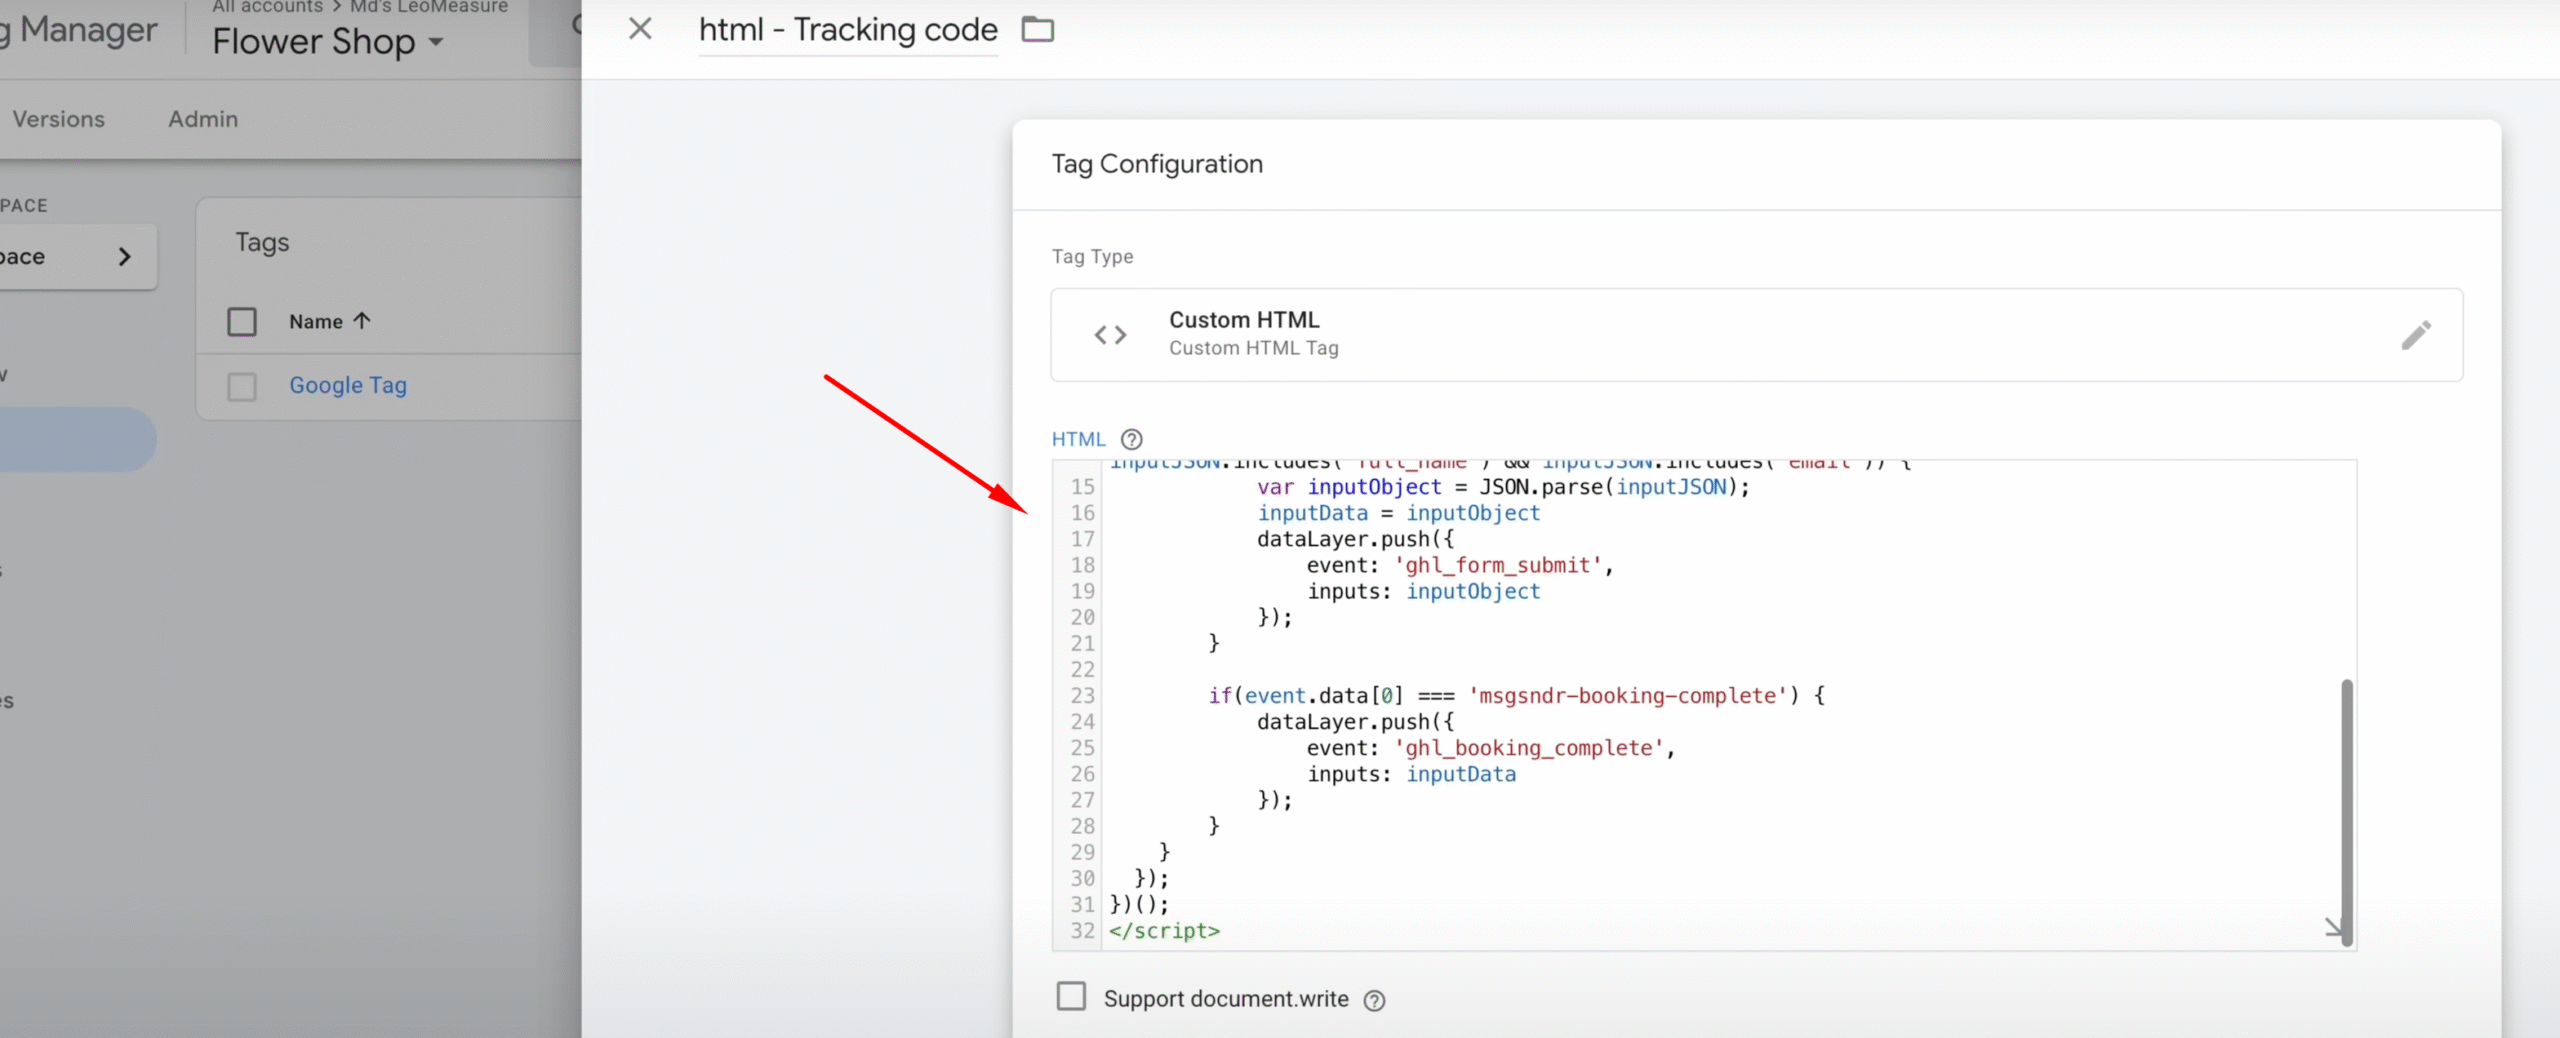
<script>
/**
* Author: Md Hasanuzzamna
* Linkedin: https://linkedin.com/in/md-h
* Youtube: https://youtube.com/@leomeasure
* Email: info@leomeasure.com
*/
(function() {
var inputData = {};
window.addEventListener('message', function (event) {
if(Object.prototype.toString.call(event.data) === '[object Array]') {
var inputJSON = event.data[2];
if(inputJSON && inputJSON.includes('full_address') && inputJSON.includes('customer_id') && inputJSON.includes('full_name') && inputJSON.includes('email')) {
var inputObject = JSON.parse(inputJSON);
inputData = inputObject
dataLayer.push({
event: 'ghl_form_submit',
inputs: inputObject
});
}
if(event.data[0] === 'msgsndr-booking-complete') {
dataLayer.push({
event: 'ghl_booking_complete',
inputs: inputData
});
}
}
});
})();
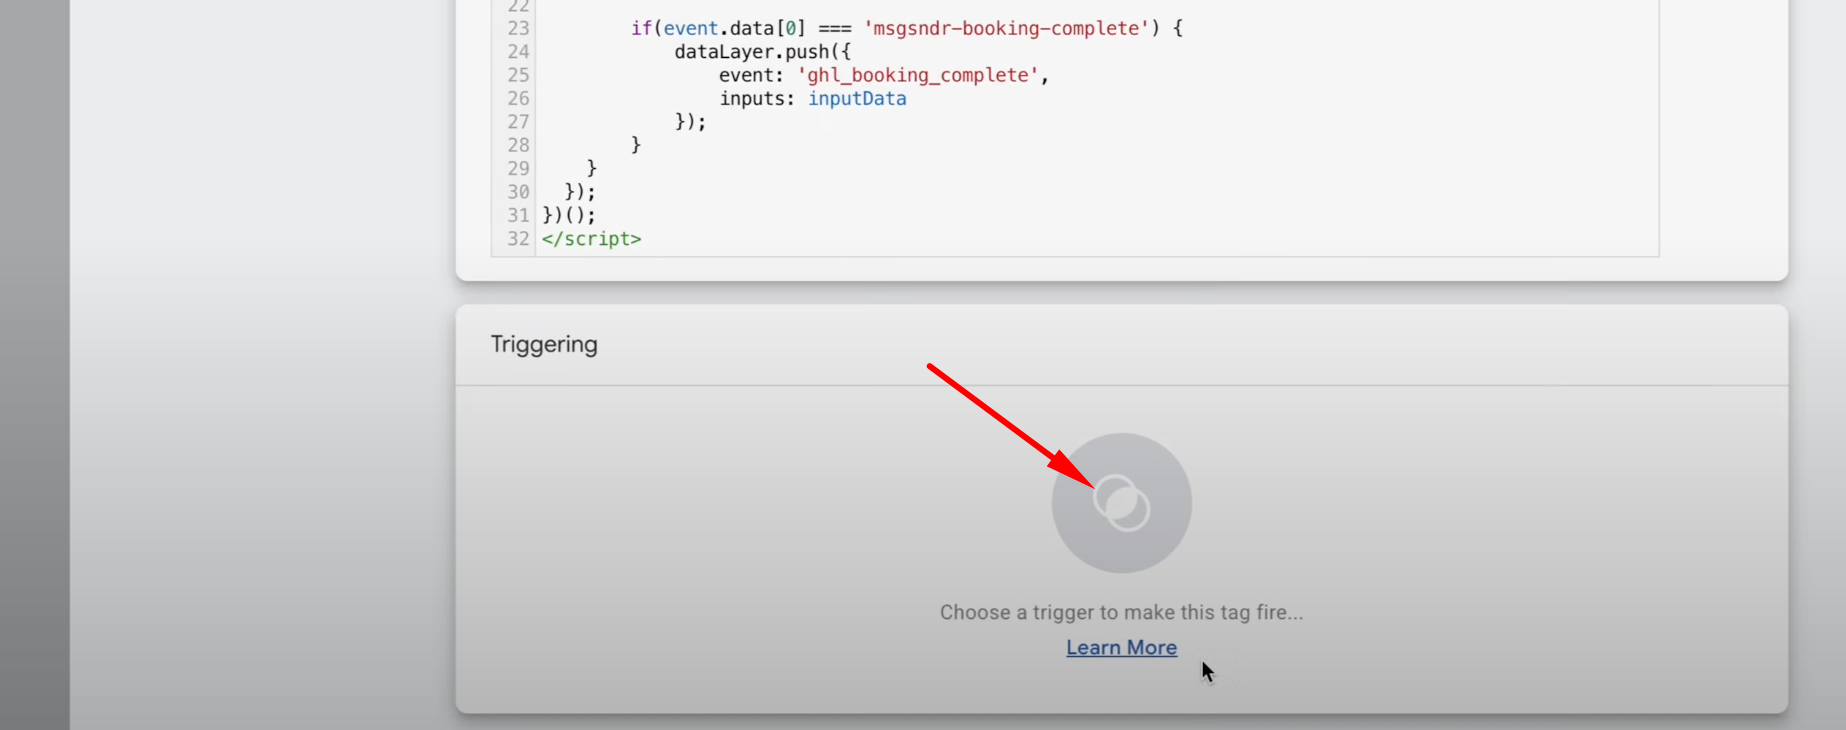
</script>Step 3: Assign Trigger
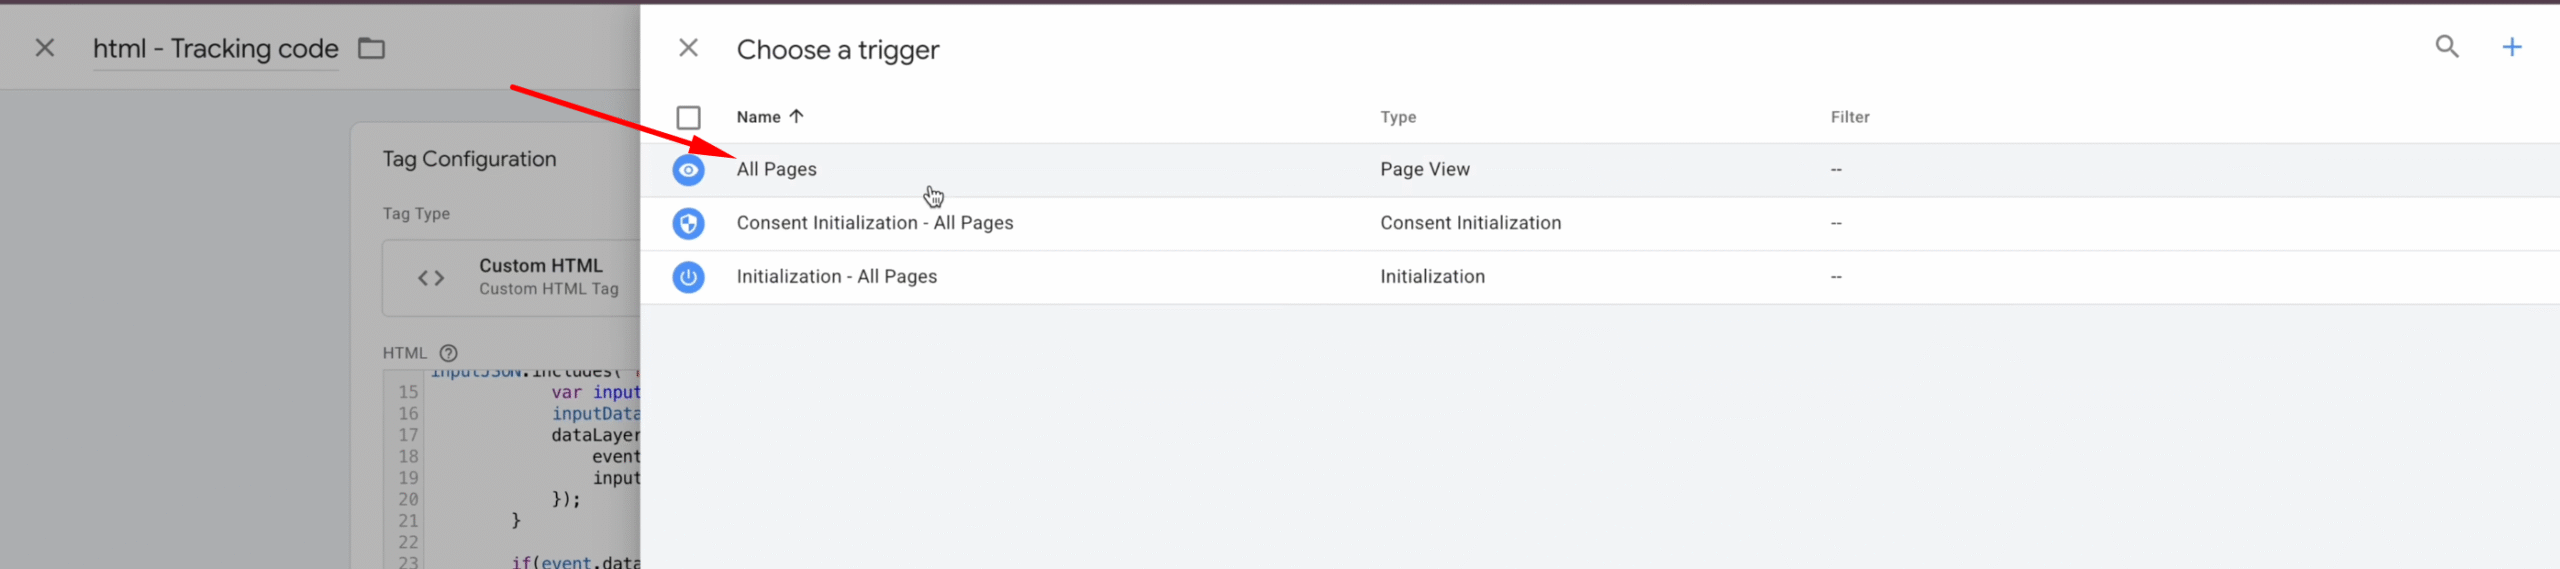
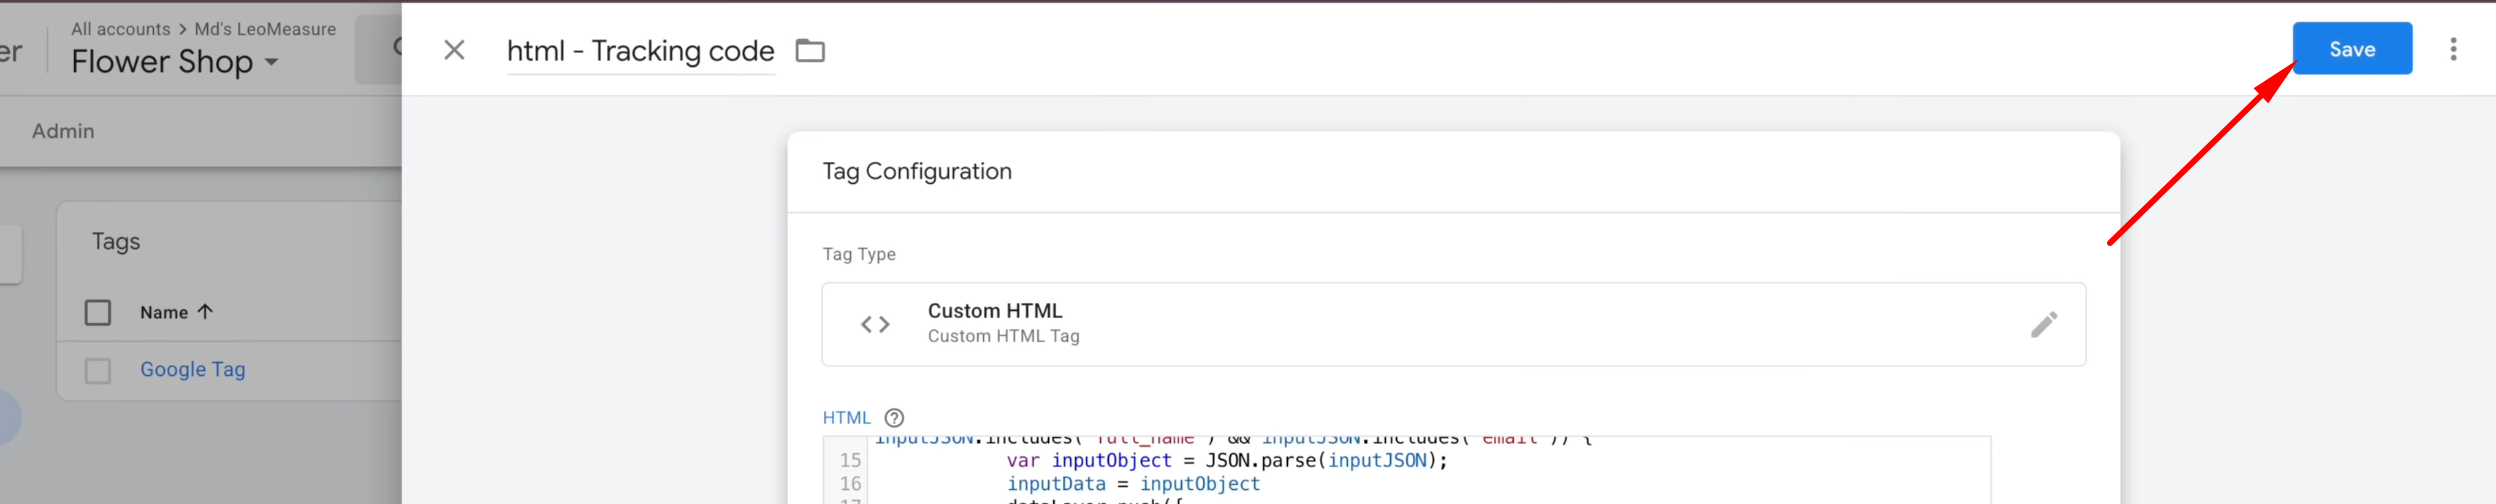
Click on the “Triggering” section, choose the trigger “All Pages,” and then save the tag as shown in the screenshot below.
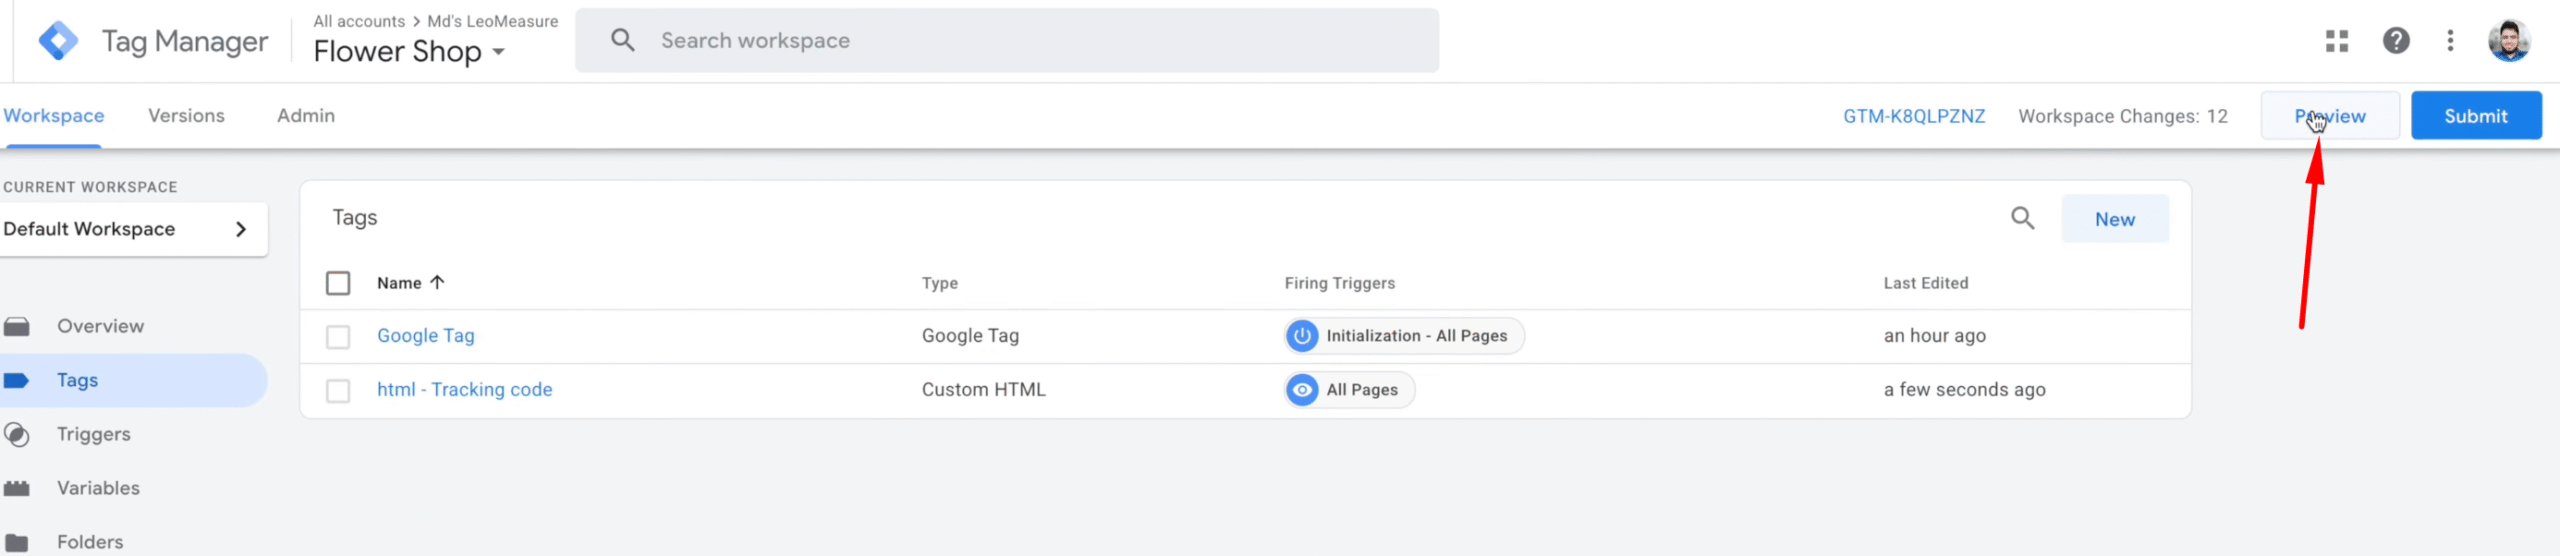
Step 4: Test DateLayer
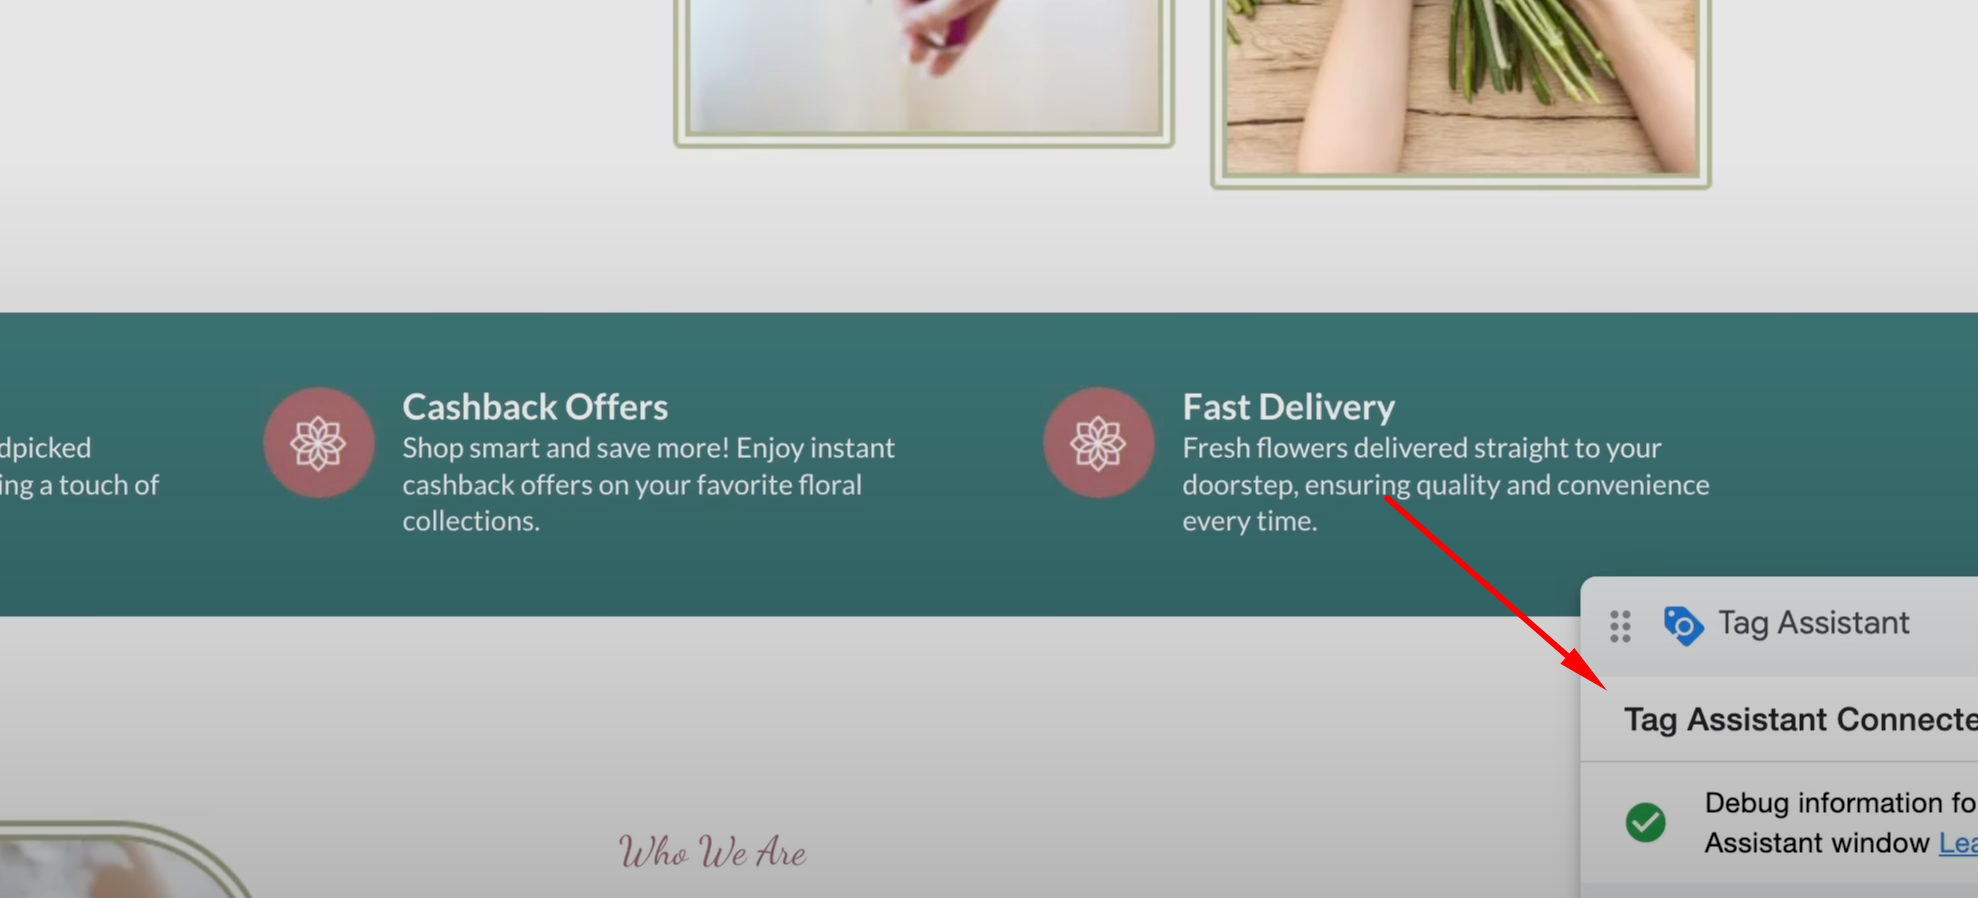
At this stage, we’re ready to test the DataLayer integration. Click the “Preview” button in the top-right corner. A popup will open in a new browser tab, where you need to enter your website URL and then click the “Continue” button.

Once you continue you it will open your website and you should see a info window as “Tag Assistant Connected”
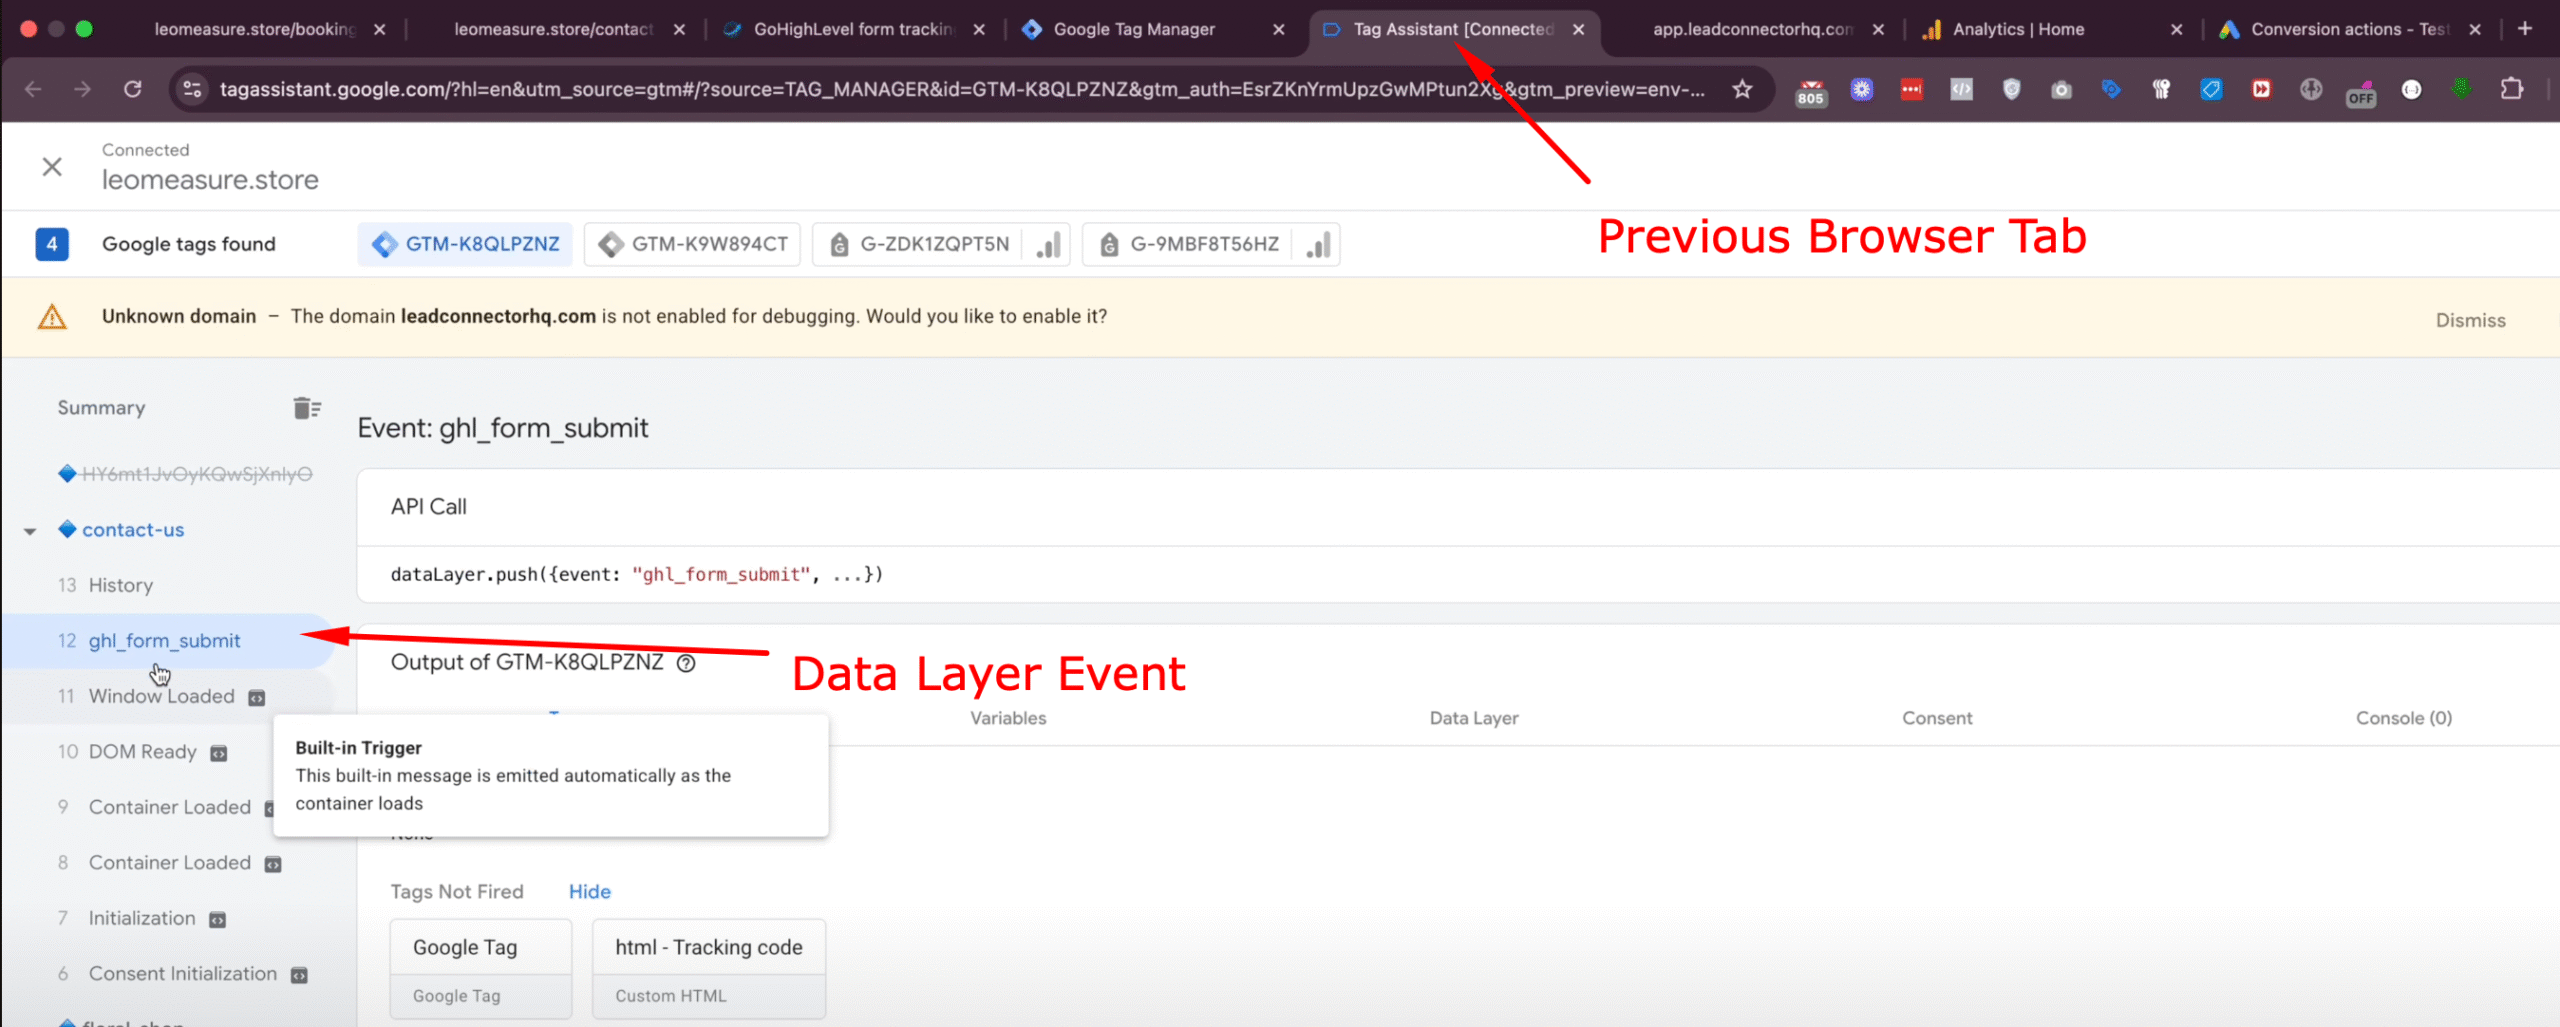
Next, go to your lead form page and submit the form.

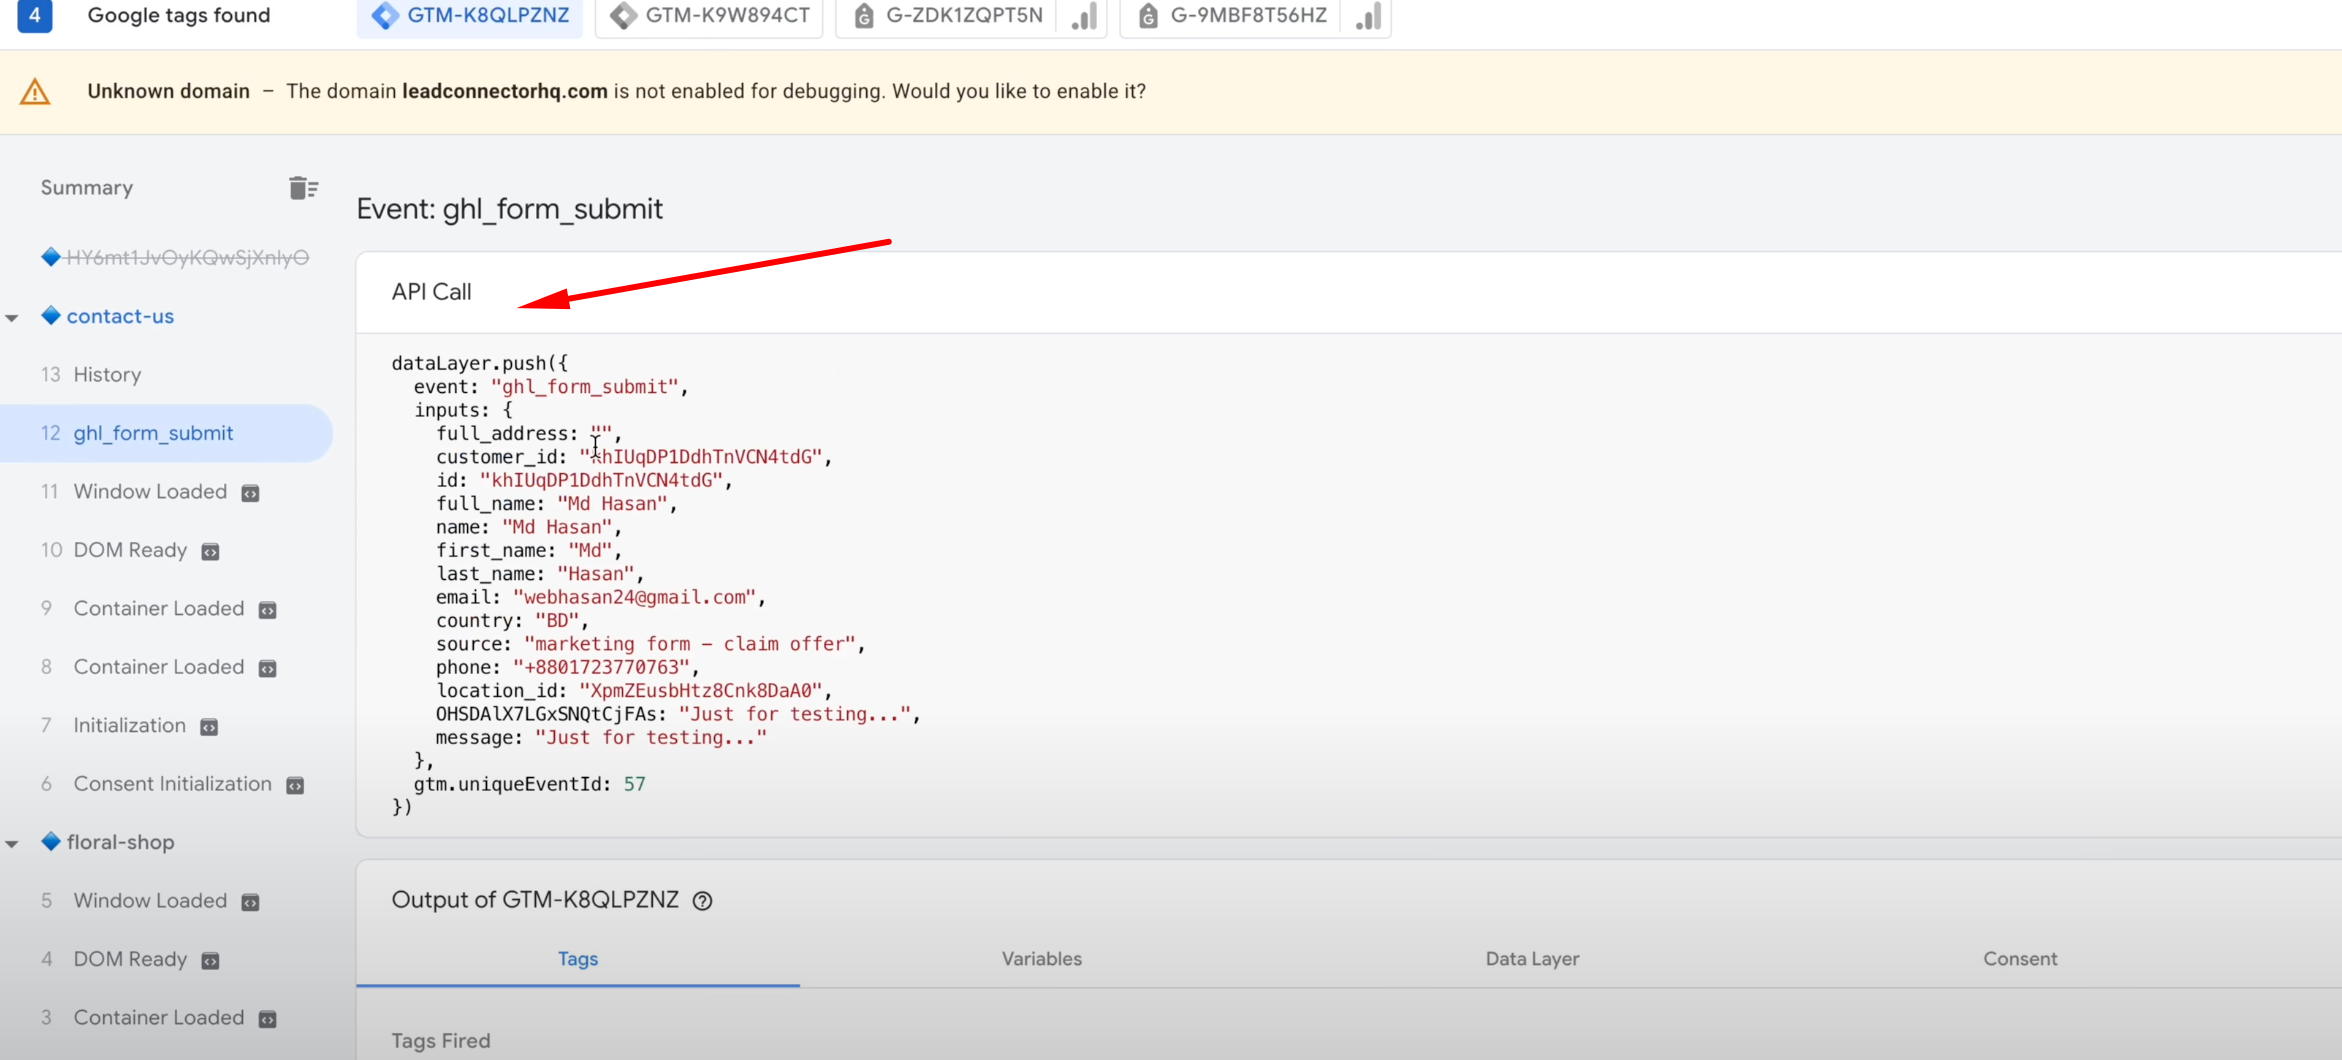
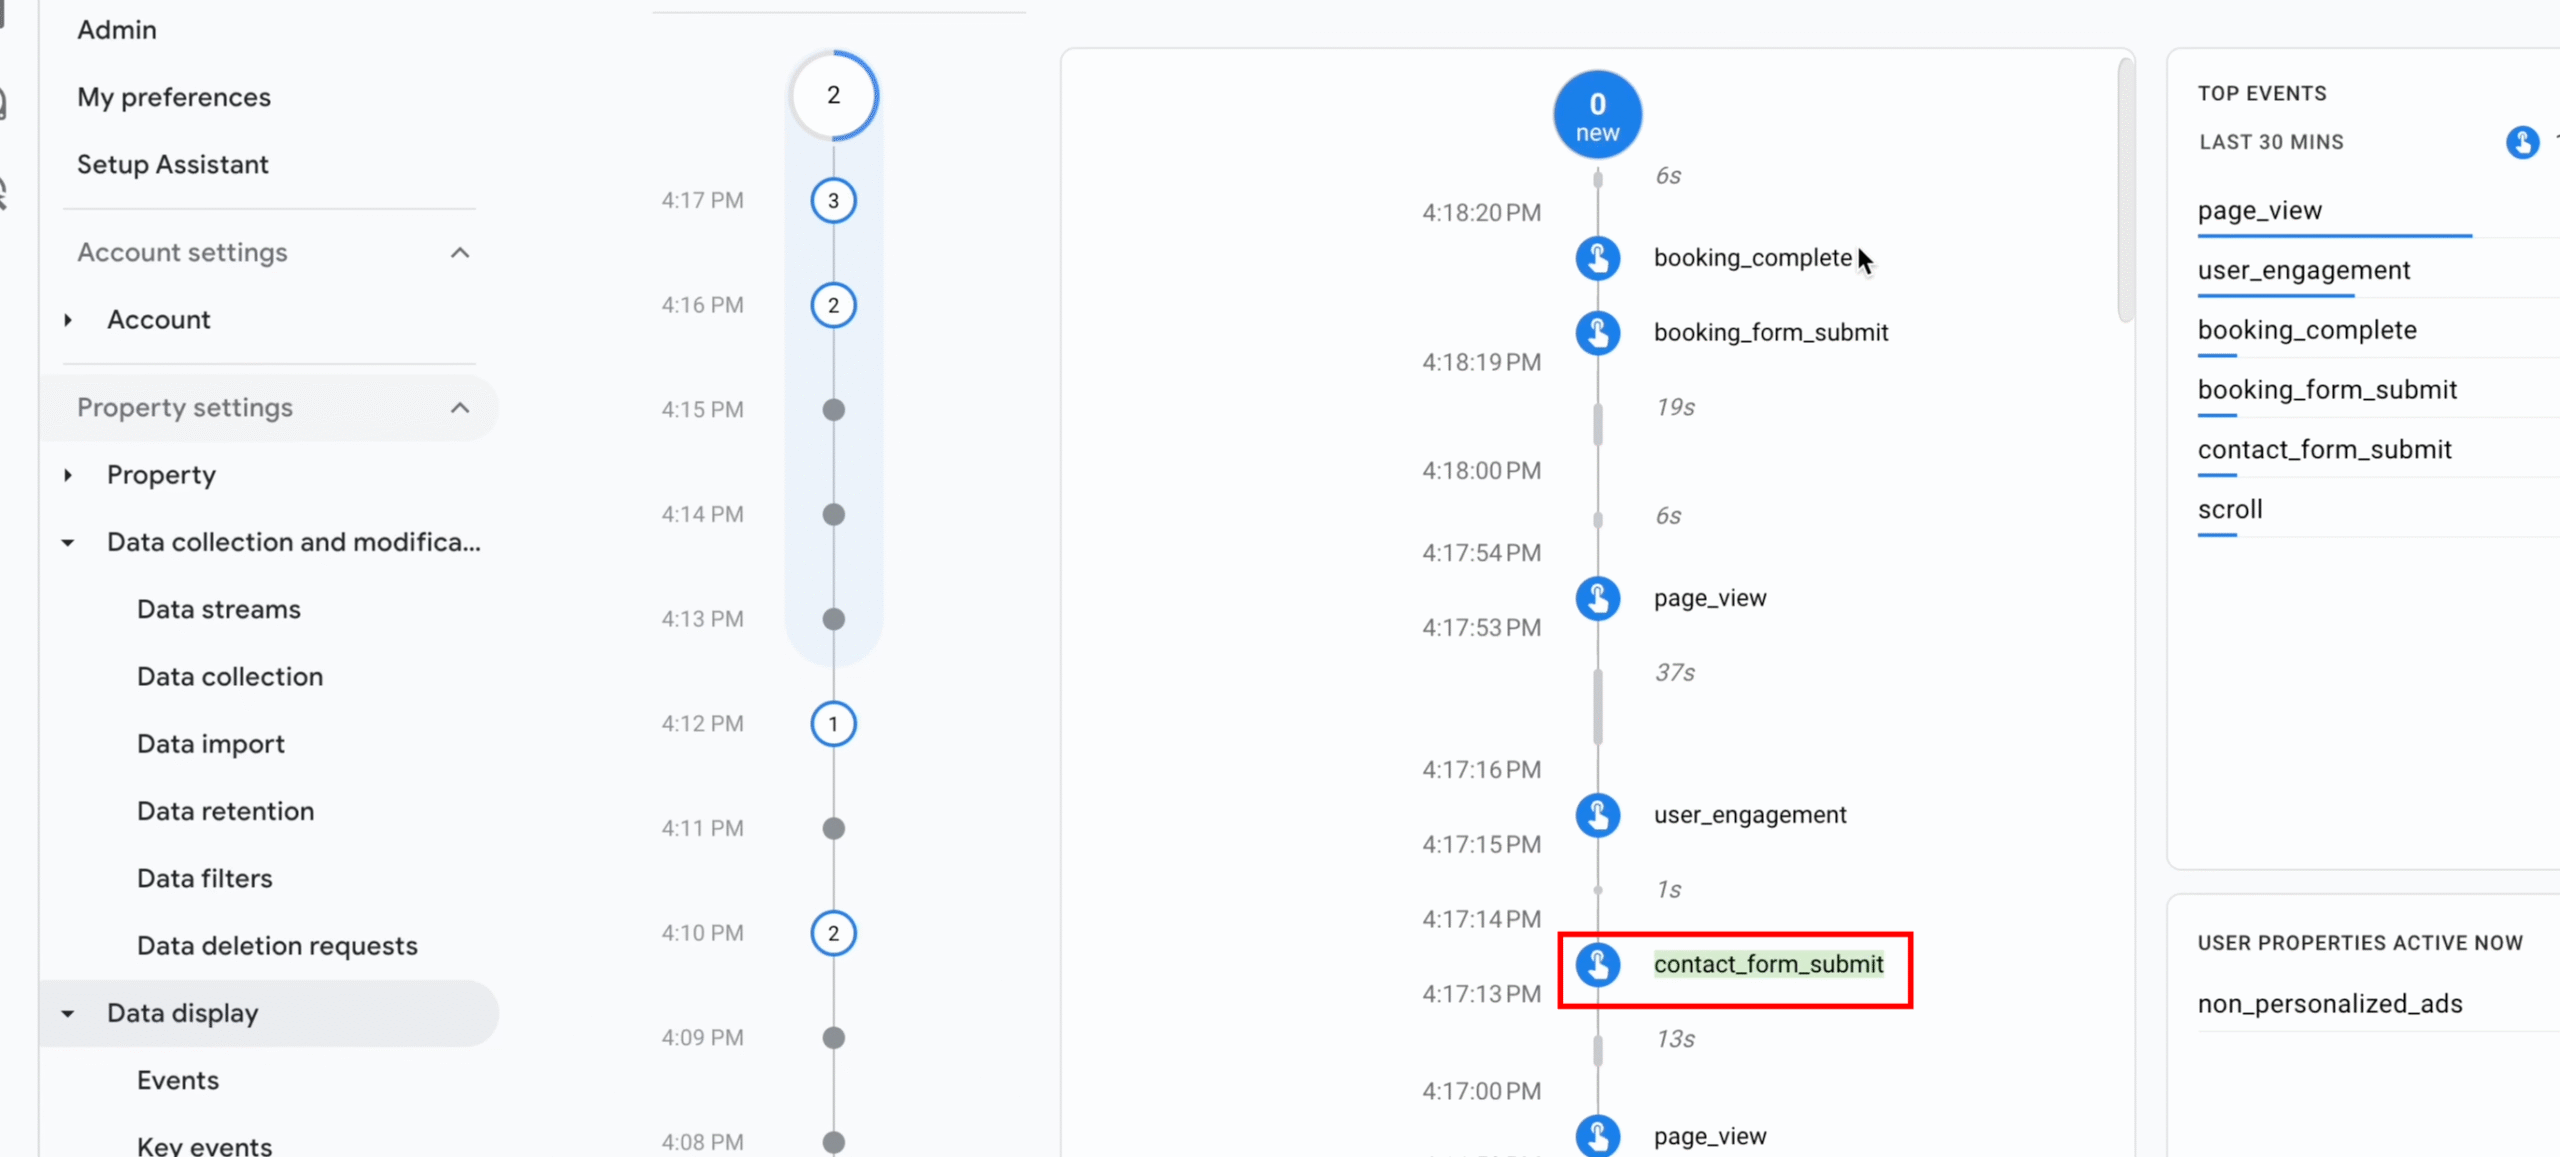
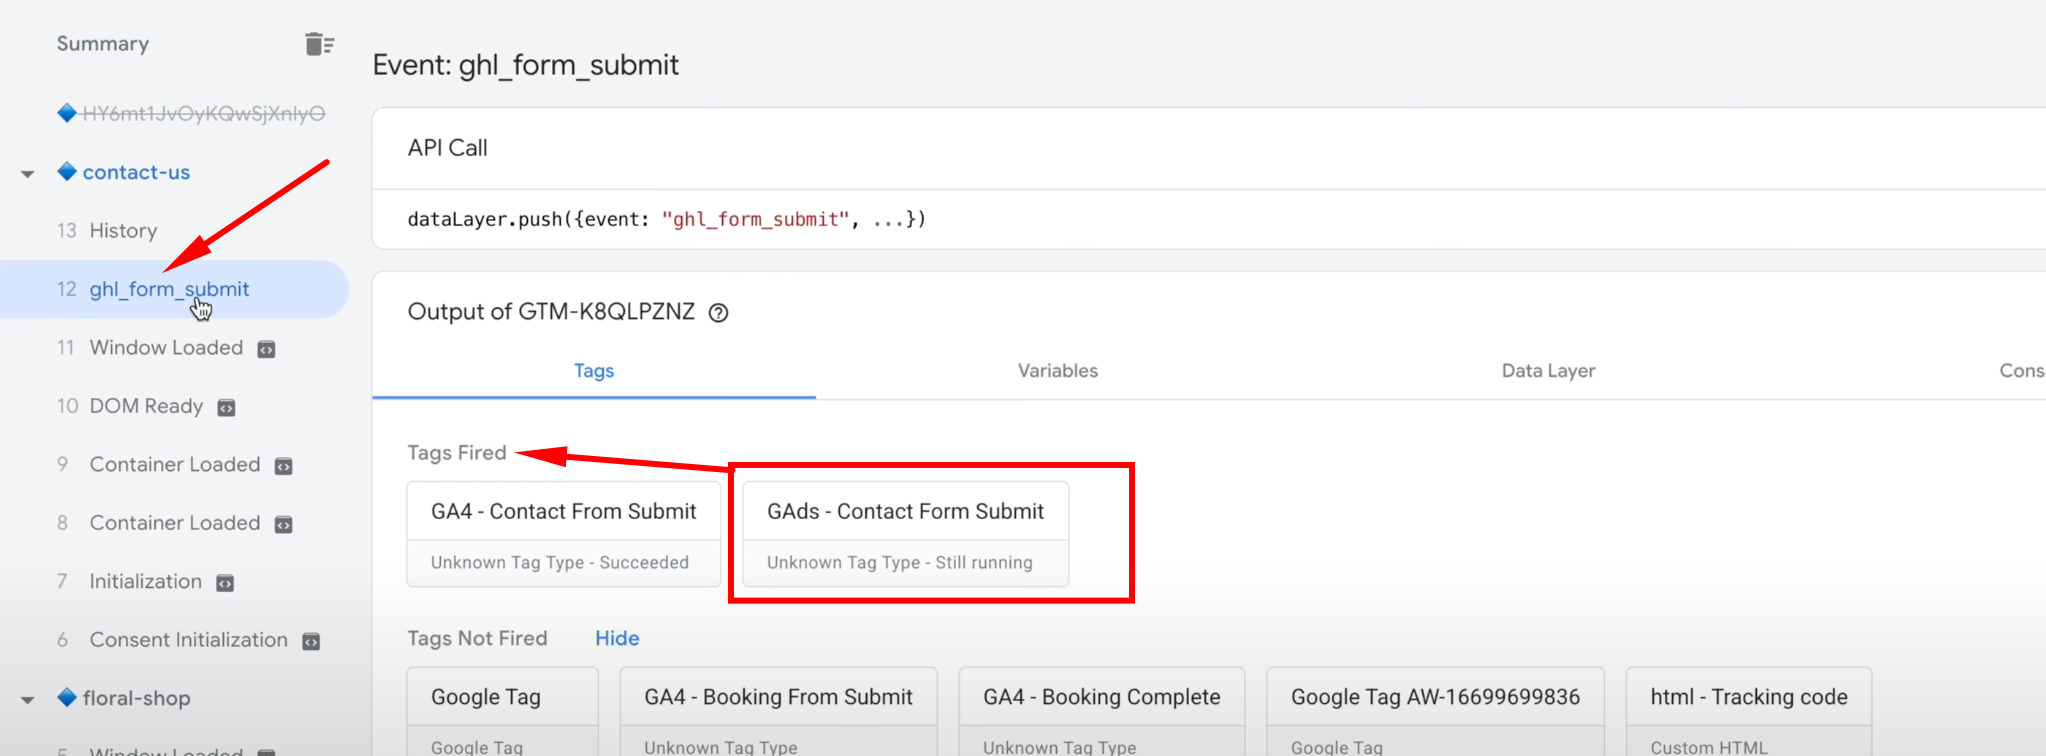
Now, switch back to the previous browser tab (the Tag Assistant Preview tab) where the DataLayer preview is displayed. On the left, under the “Summary” section, you should see the ghl_form_submit DataLayer event. If you click on the API call, you will be able to view the user-provided DataLayer values, such as email and other details.
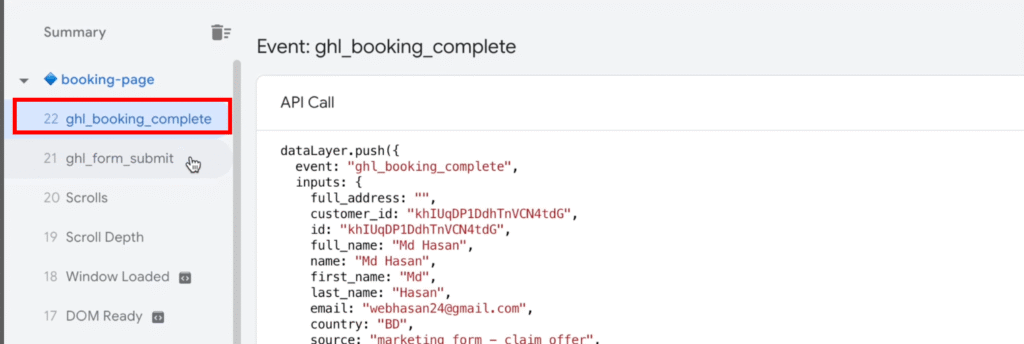
Similarly, if your website has a booking form, submitting it will show a DataLayer event named ghl_booking_complete in the GTM preview.

Lead Form Tracking For GA4
At this stage, Google Tag Manager is listening for form submissions and capturing user data. Next, we need to create a new tag for Google Analytics 4 to send this information from Google Tag Manager to your Google Analytics.
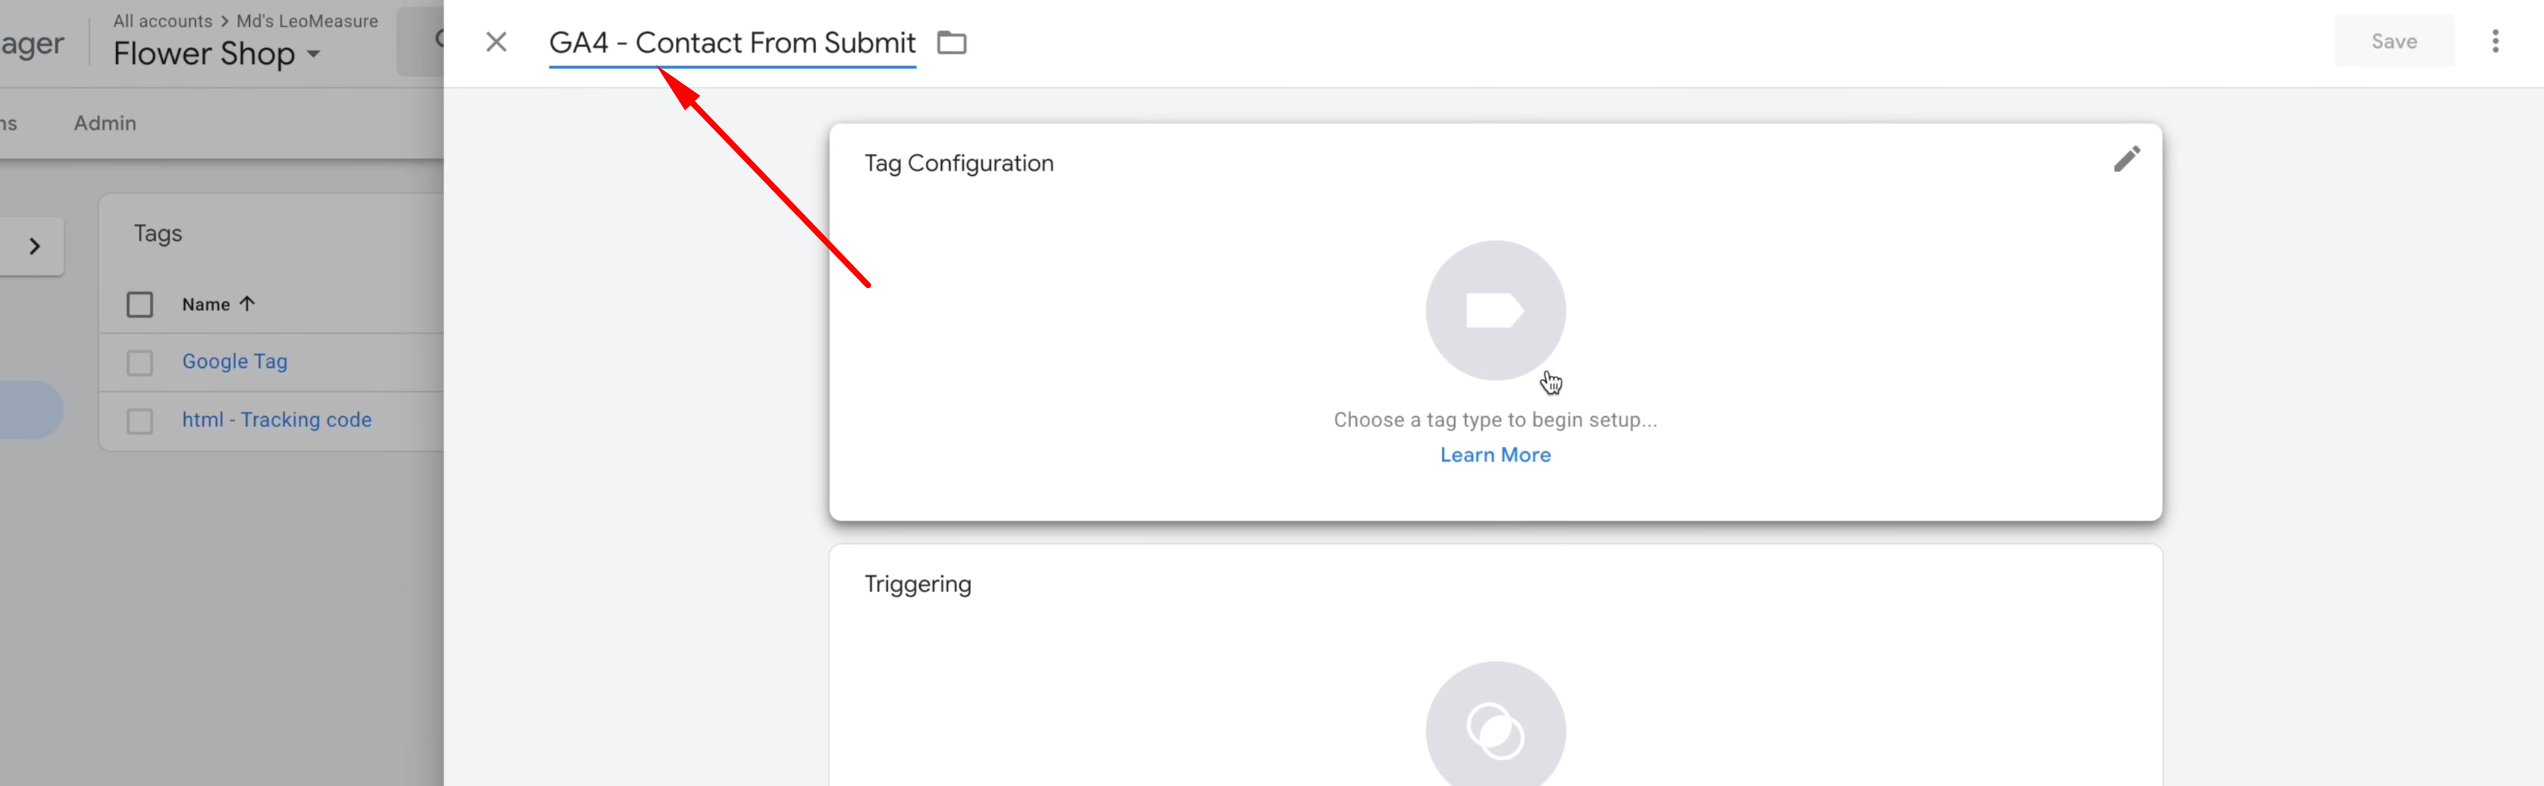
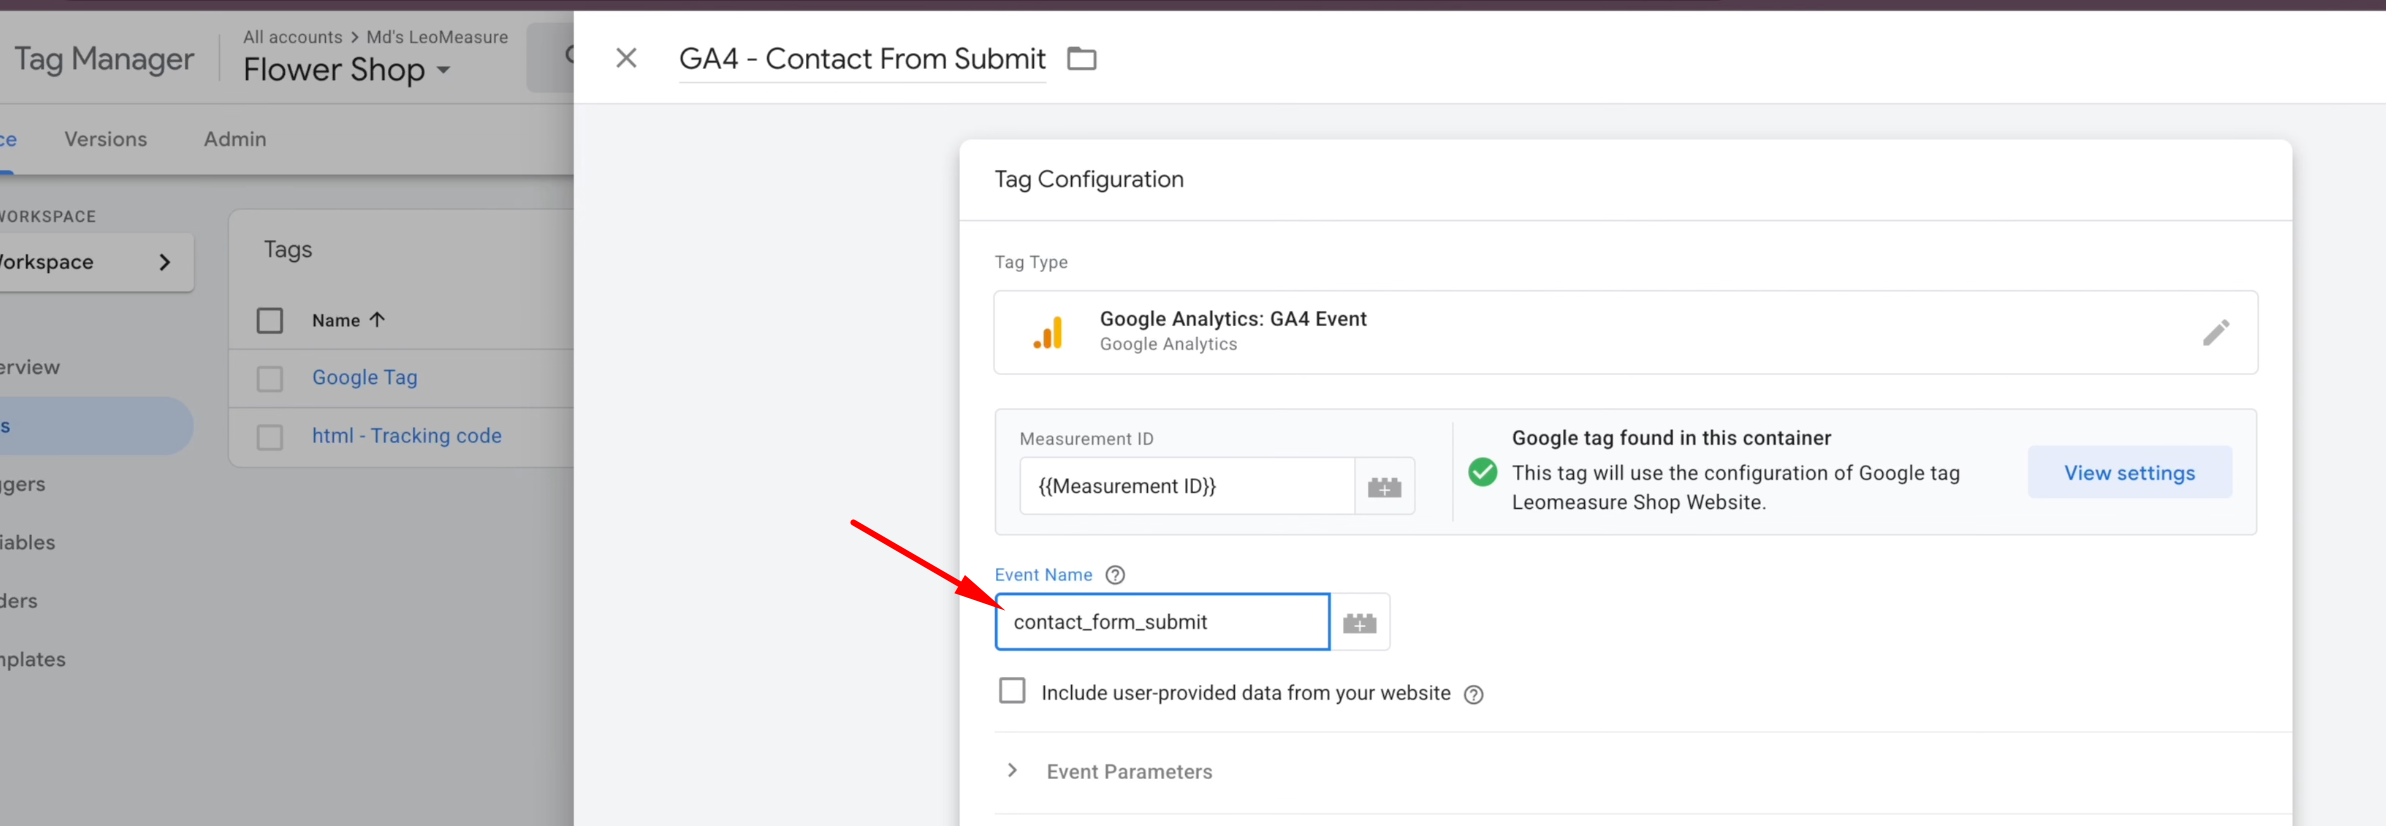
Step 1: Create Tag For GA4
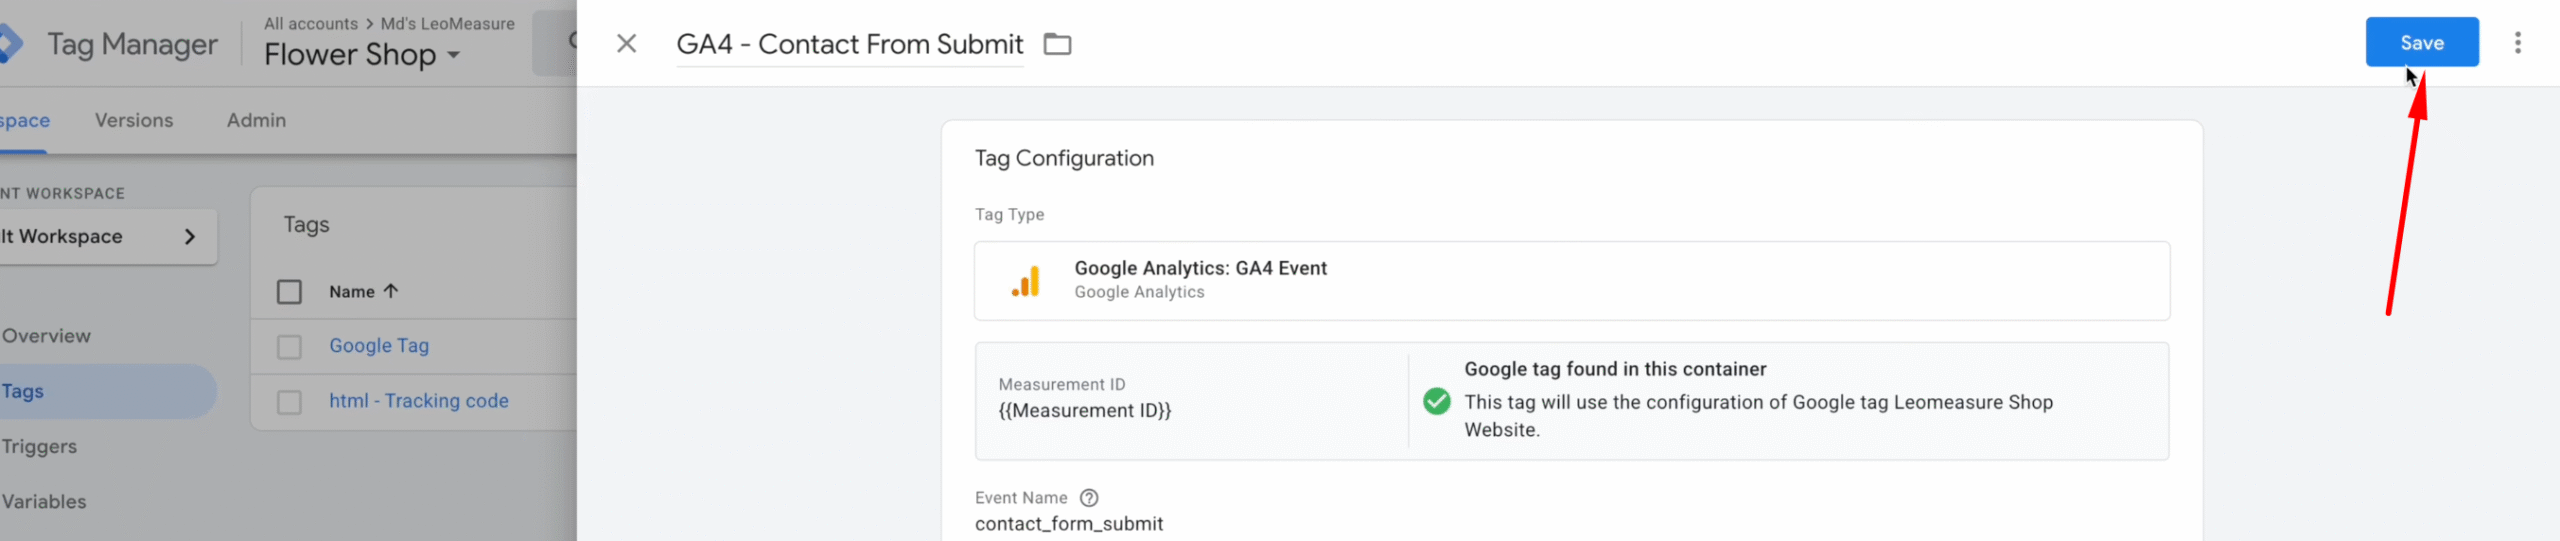
In Google Tag Manager, go to the “Tags” section and click the “New” button in the top-right corner to create a new tag. And give a title for the tag

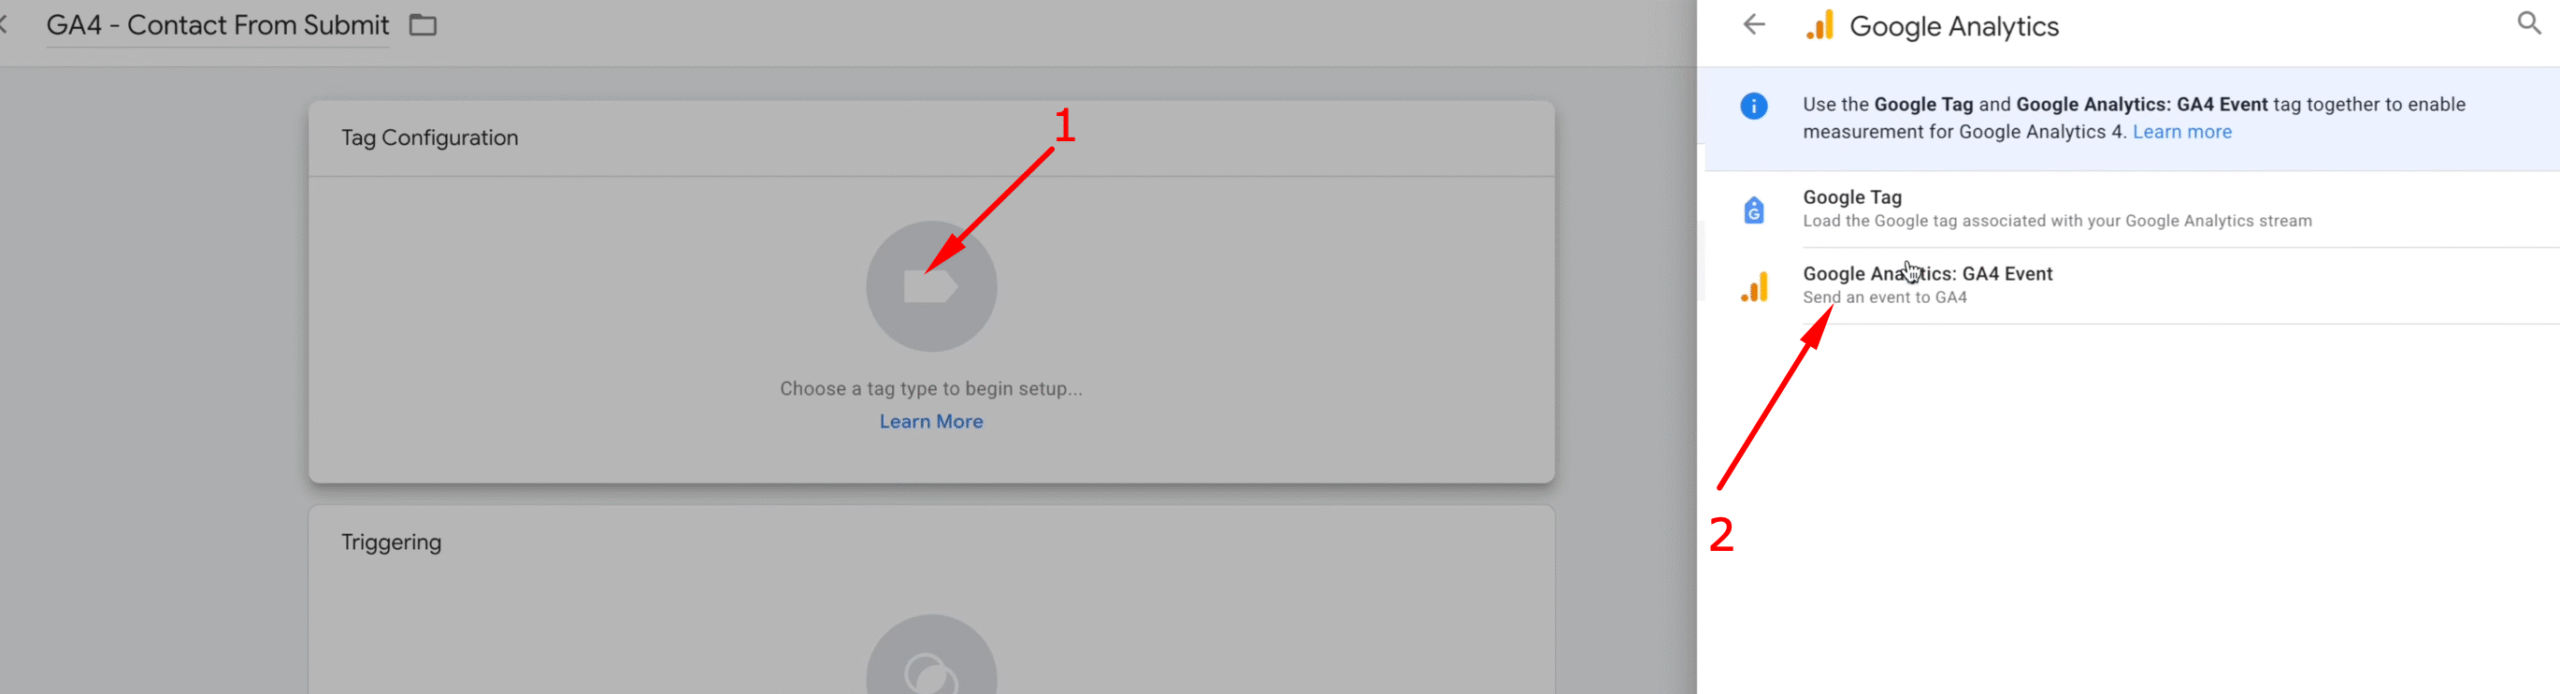
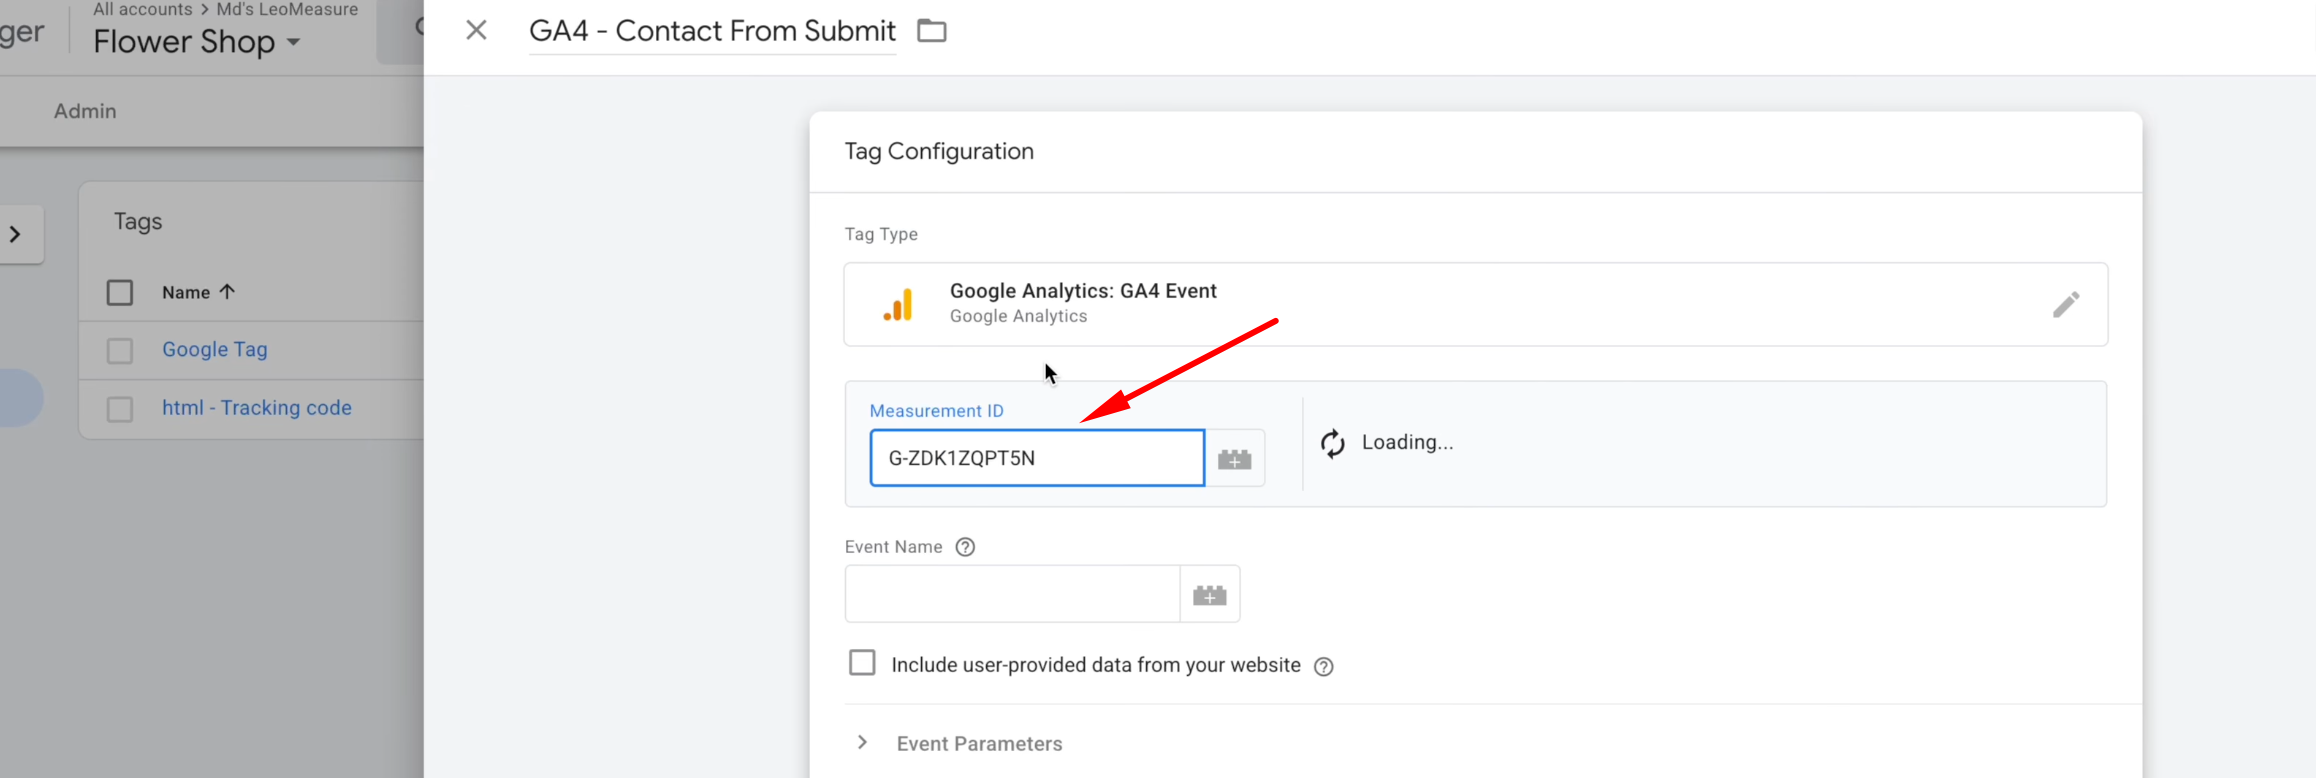
Click on the “Tag Configuration” area and select “Google Analytics: GA4 Event.” Then, copy your Measurement ID from Google Analytics and paste it into the “Measurement ID” field. In the “Event Name” field, enter a name for your event, for example: contact_form_submit.
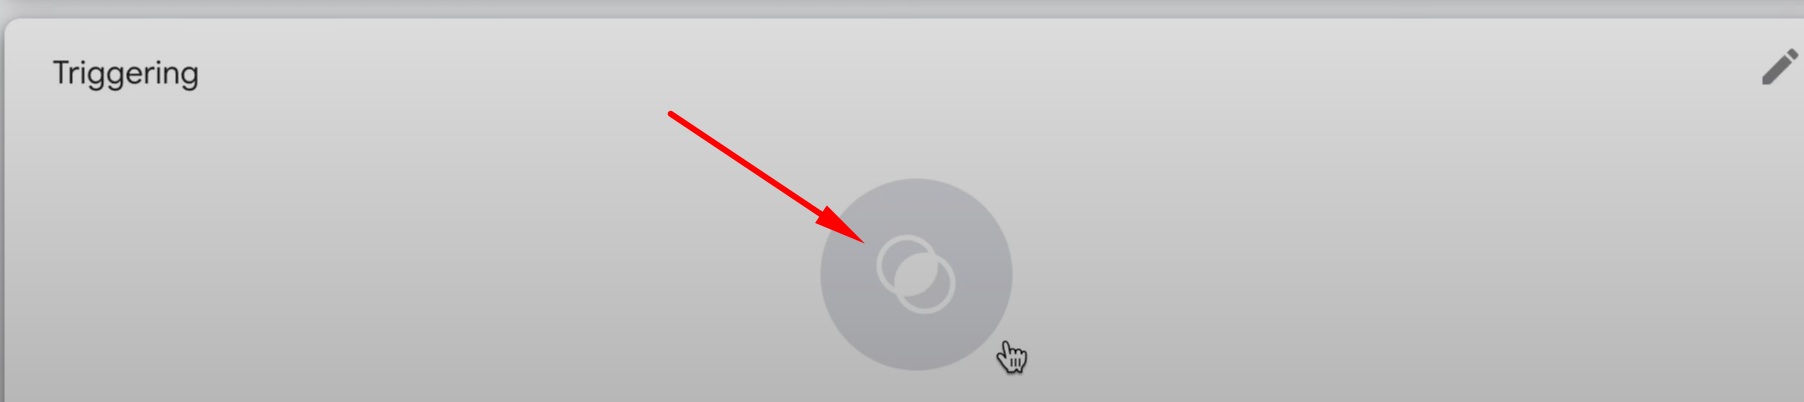
Step 2: Create Trigger
Next, click on the “Triggering” section and then click the “+” icon on the right side to create a new trigger.

Now, enter a title for your trigger and click on the “Trigger Configuration” area.
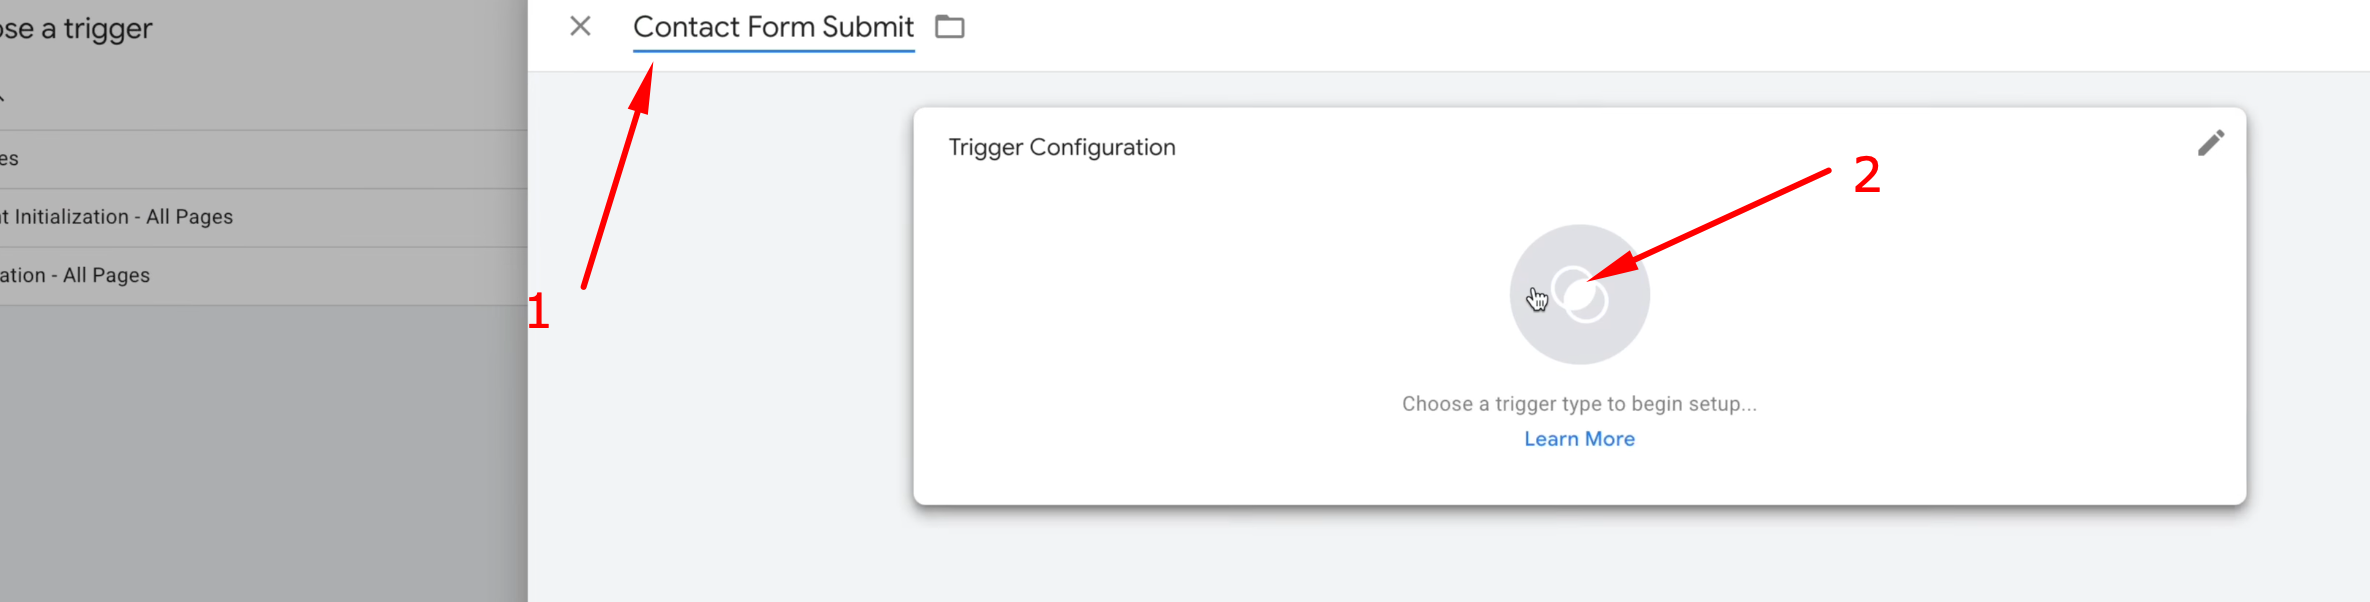
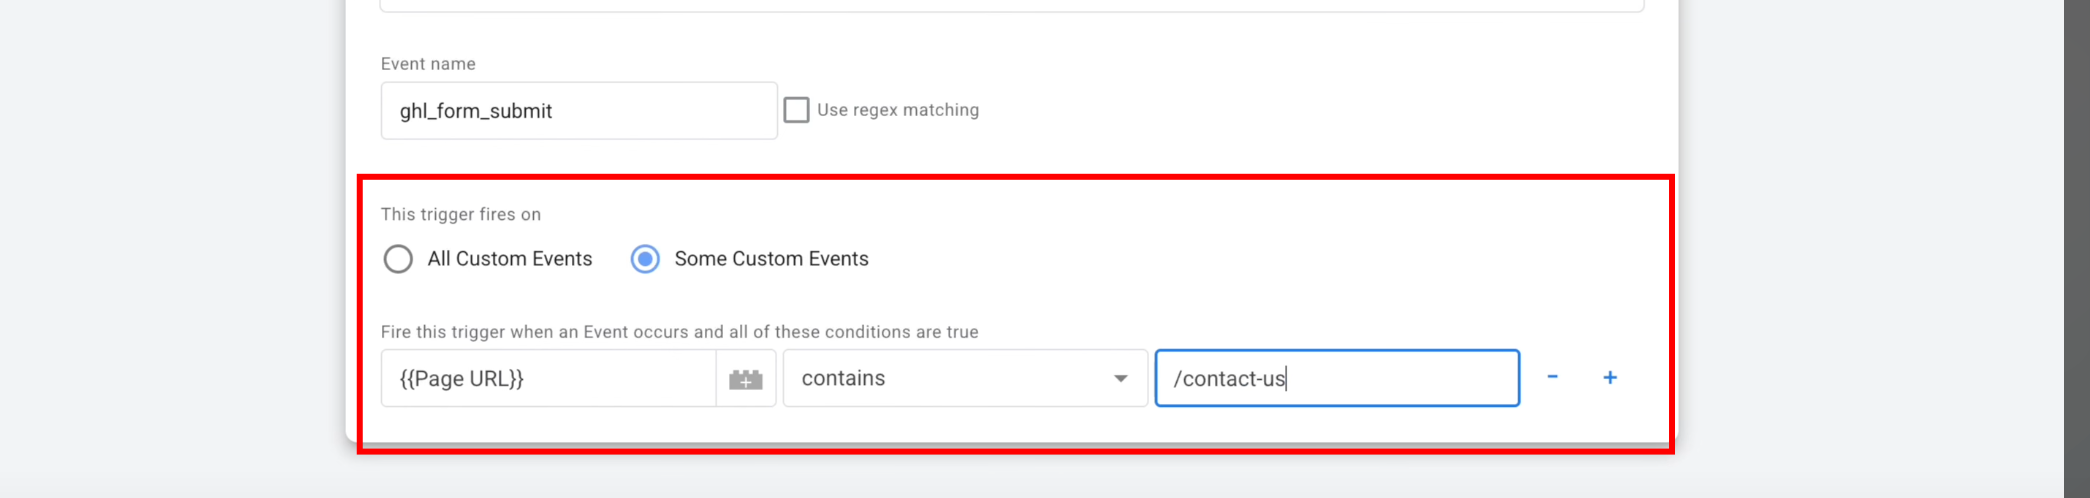
For the trigger configuration, select “Custom Event” and enter the event name as ghl_form_submit. This is the event you saw in the DataLayer in the GTM preview.

This setup is fine if you have a single contact form on your website or if you want a single form submission event for all forms. However, if you want to create separate events for each form, you need to add an additional condition by selecting “Some Custom Events” and specifying the page path, as shown below.
Finally, click the “Save” button to save your trigger, and then click “Save” again to save the entire tag.
Step 3: Test GA4
The GA4 tag has been created. Now it’s time to test it to ensure everything is working as expected. To test our setup again we need to go to GTM preview like before.
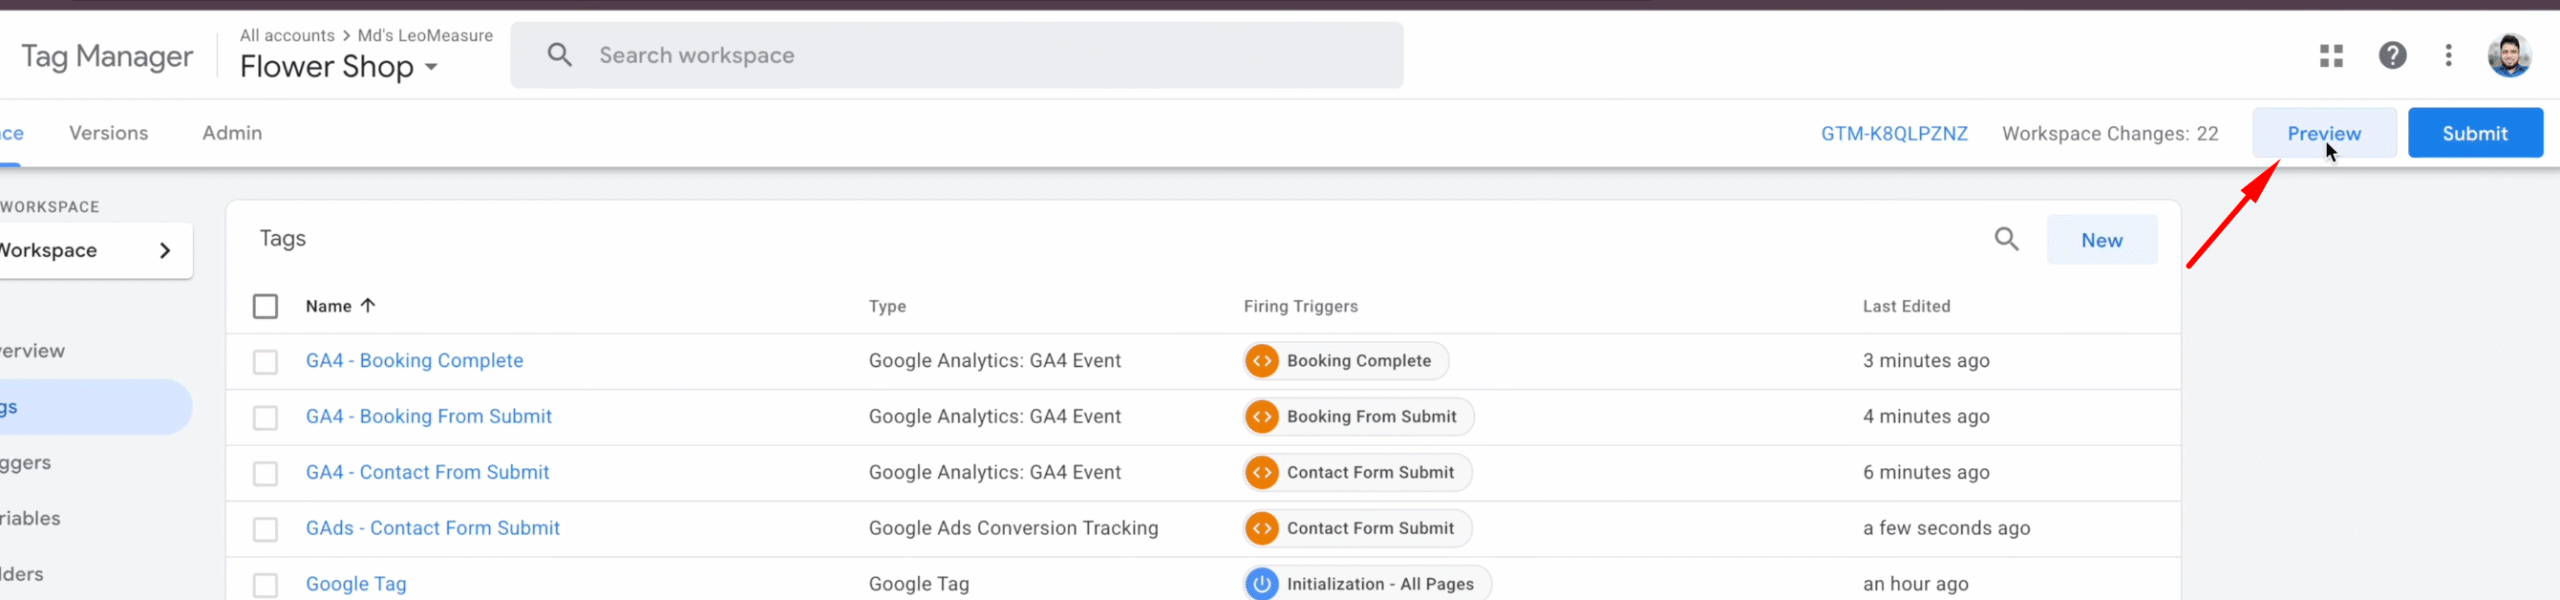
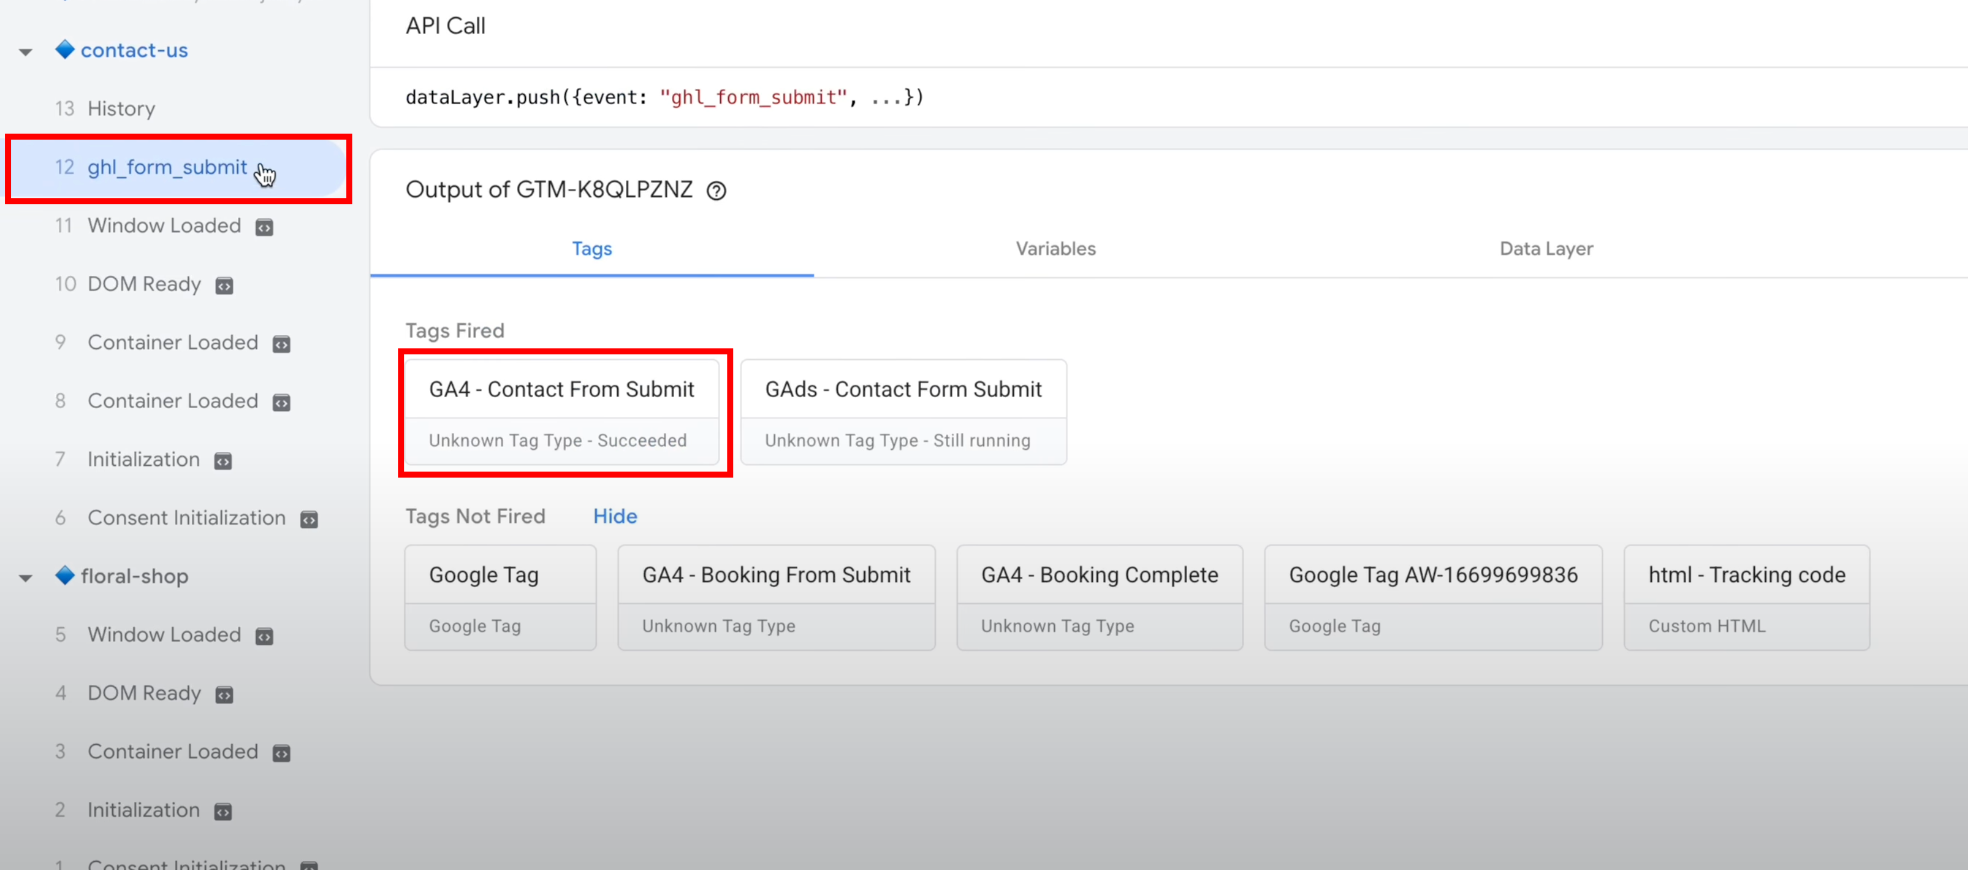
In the GTM preview, you should see ghl_form_submit appear. When you click on it, under Tags Fired, you should see “GA4 – Contact Form Submit”. So we are confirmed GA4 tag setup is okay.
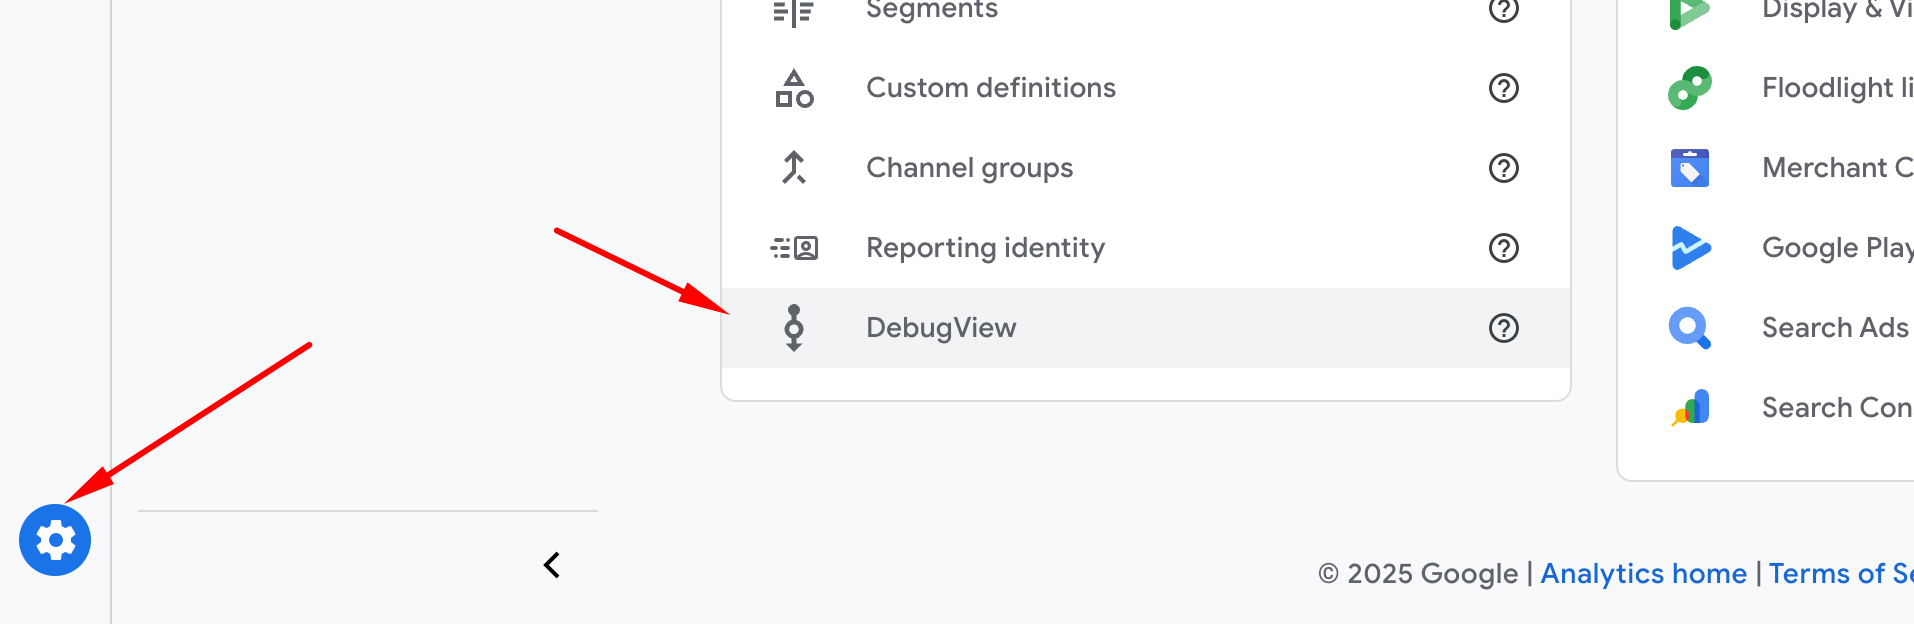
To inspect further, go to Google Analytics DebugView, where you should see the “contact_form_submit” event.
Once everything is confirmed, we can go ahead and publish the setup in Google Tag Manager.


GoHighLevel Lead From Tracking for Google Ads
Just like the Google Analytics tag, we need to create a Google Ads tag to send tracking data to the Google Ads platform.
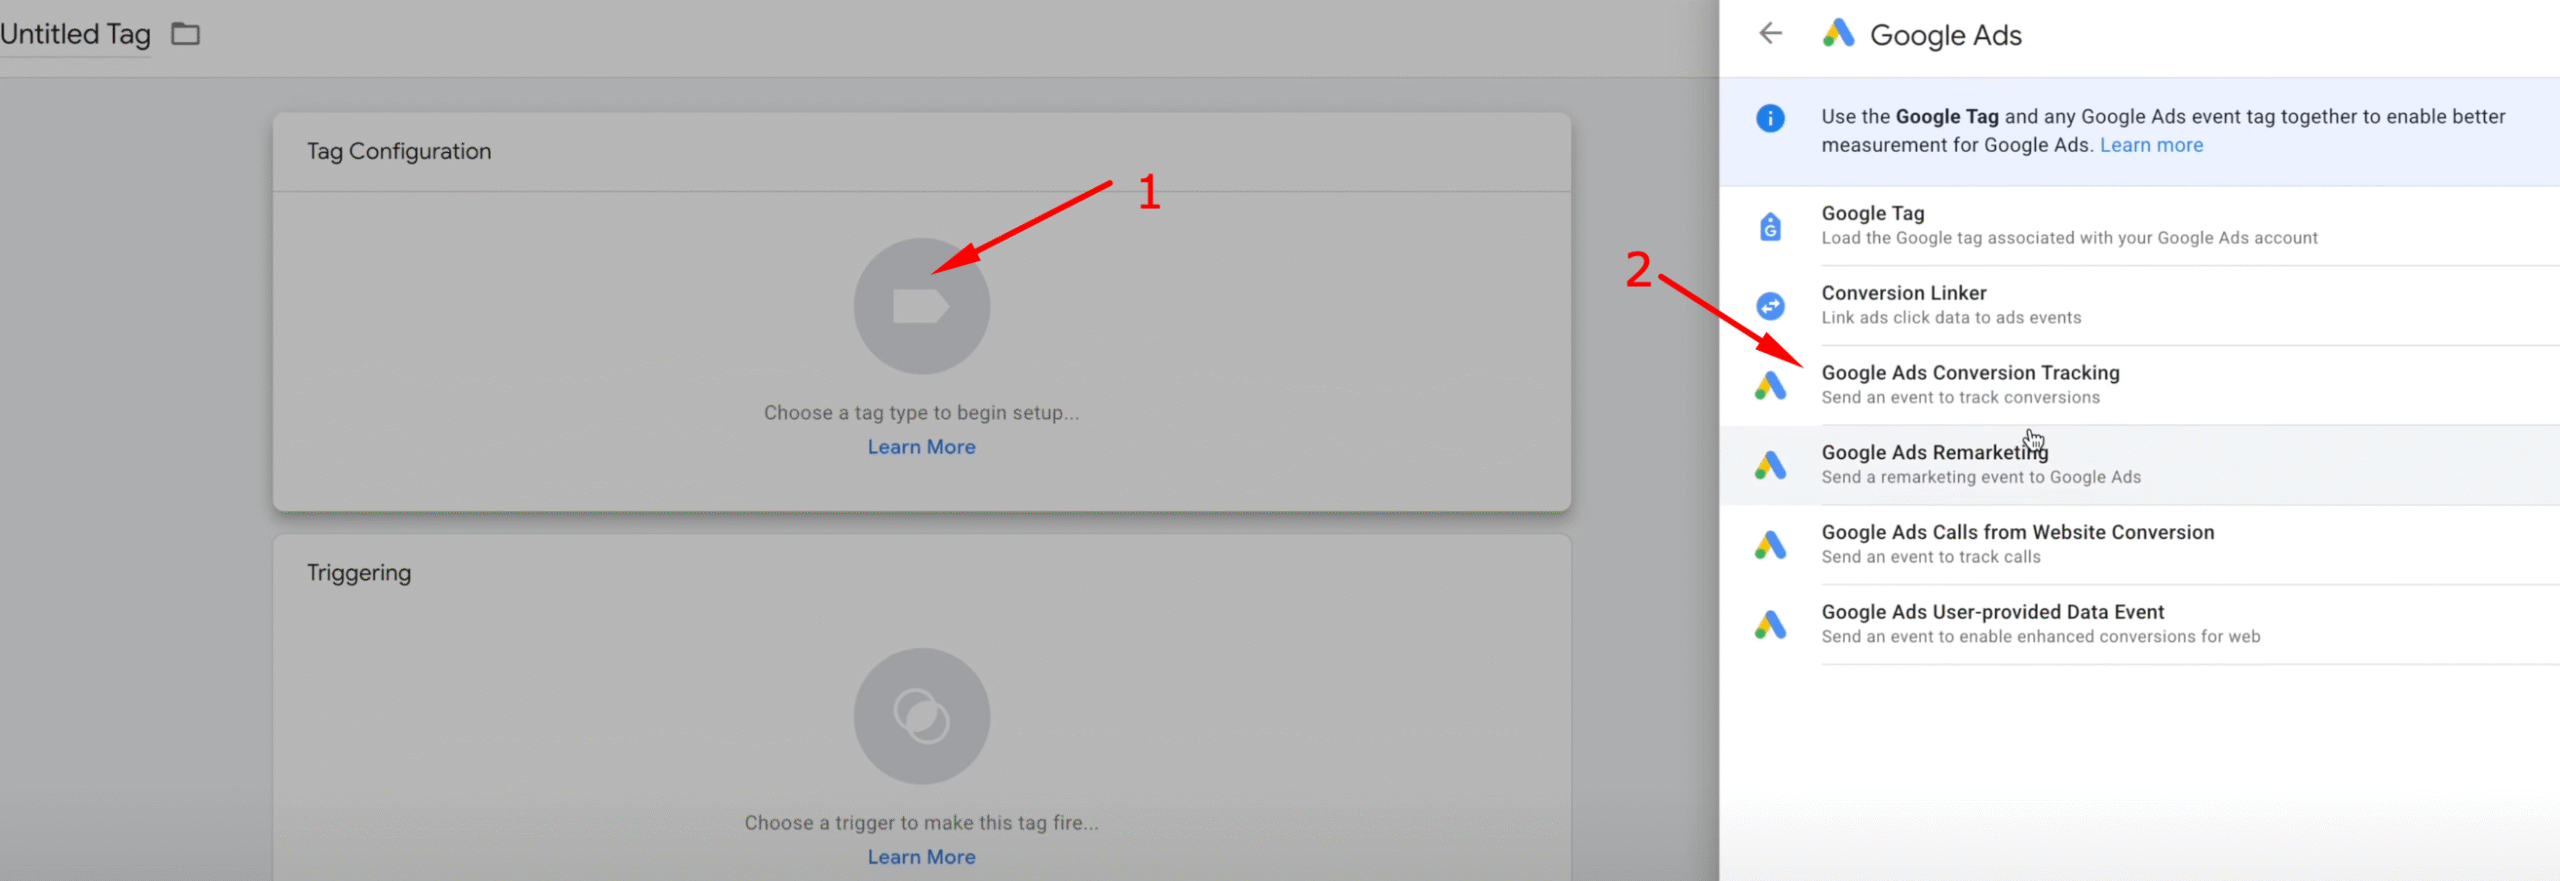
Step 1: Google Ads Tag Creation
As before, click the New button in the top-right corner to create a new tag.
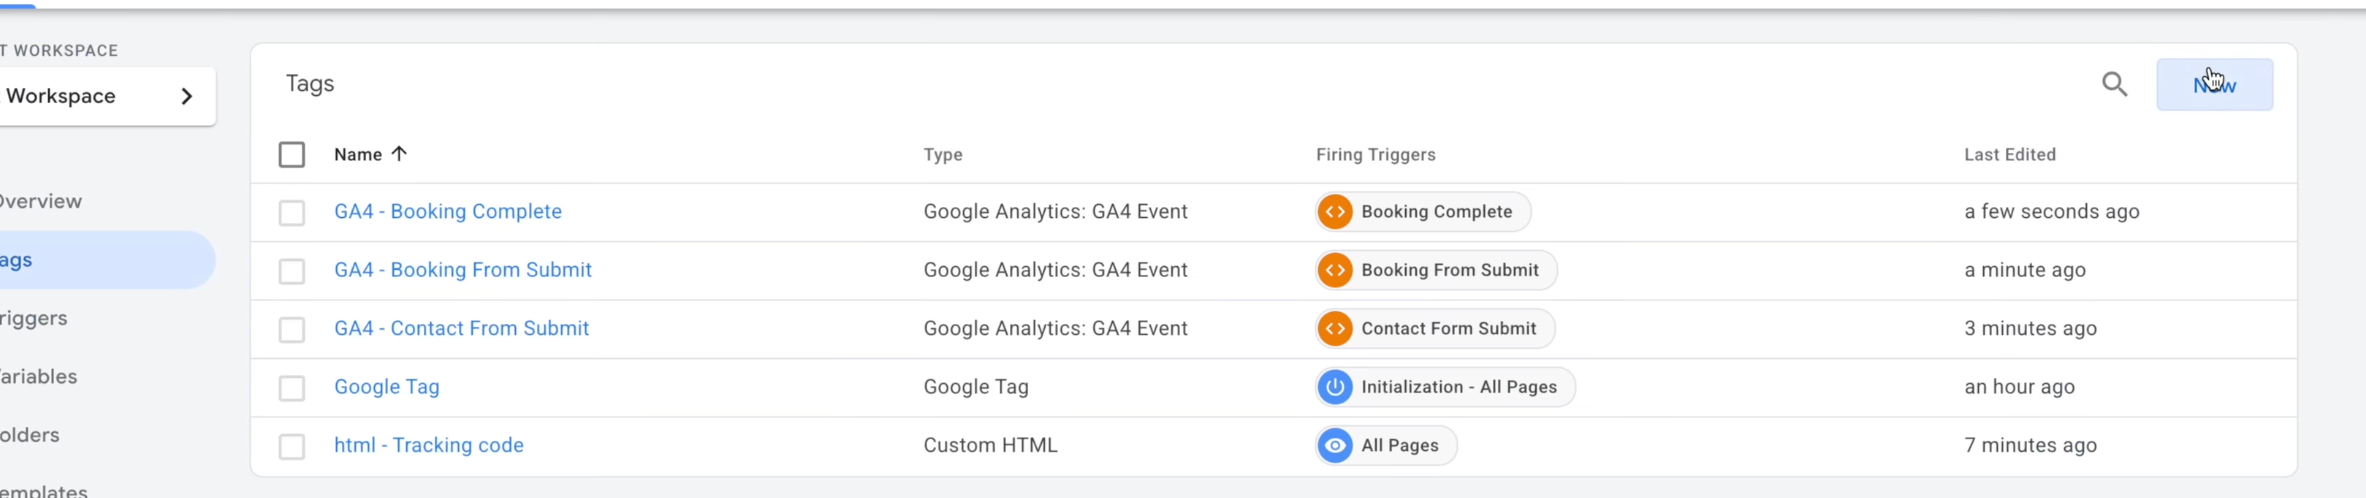
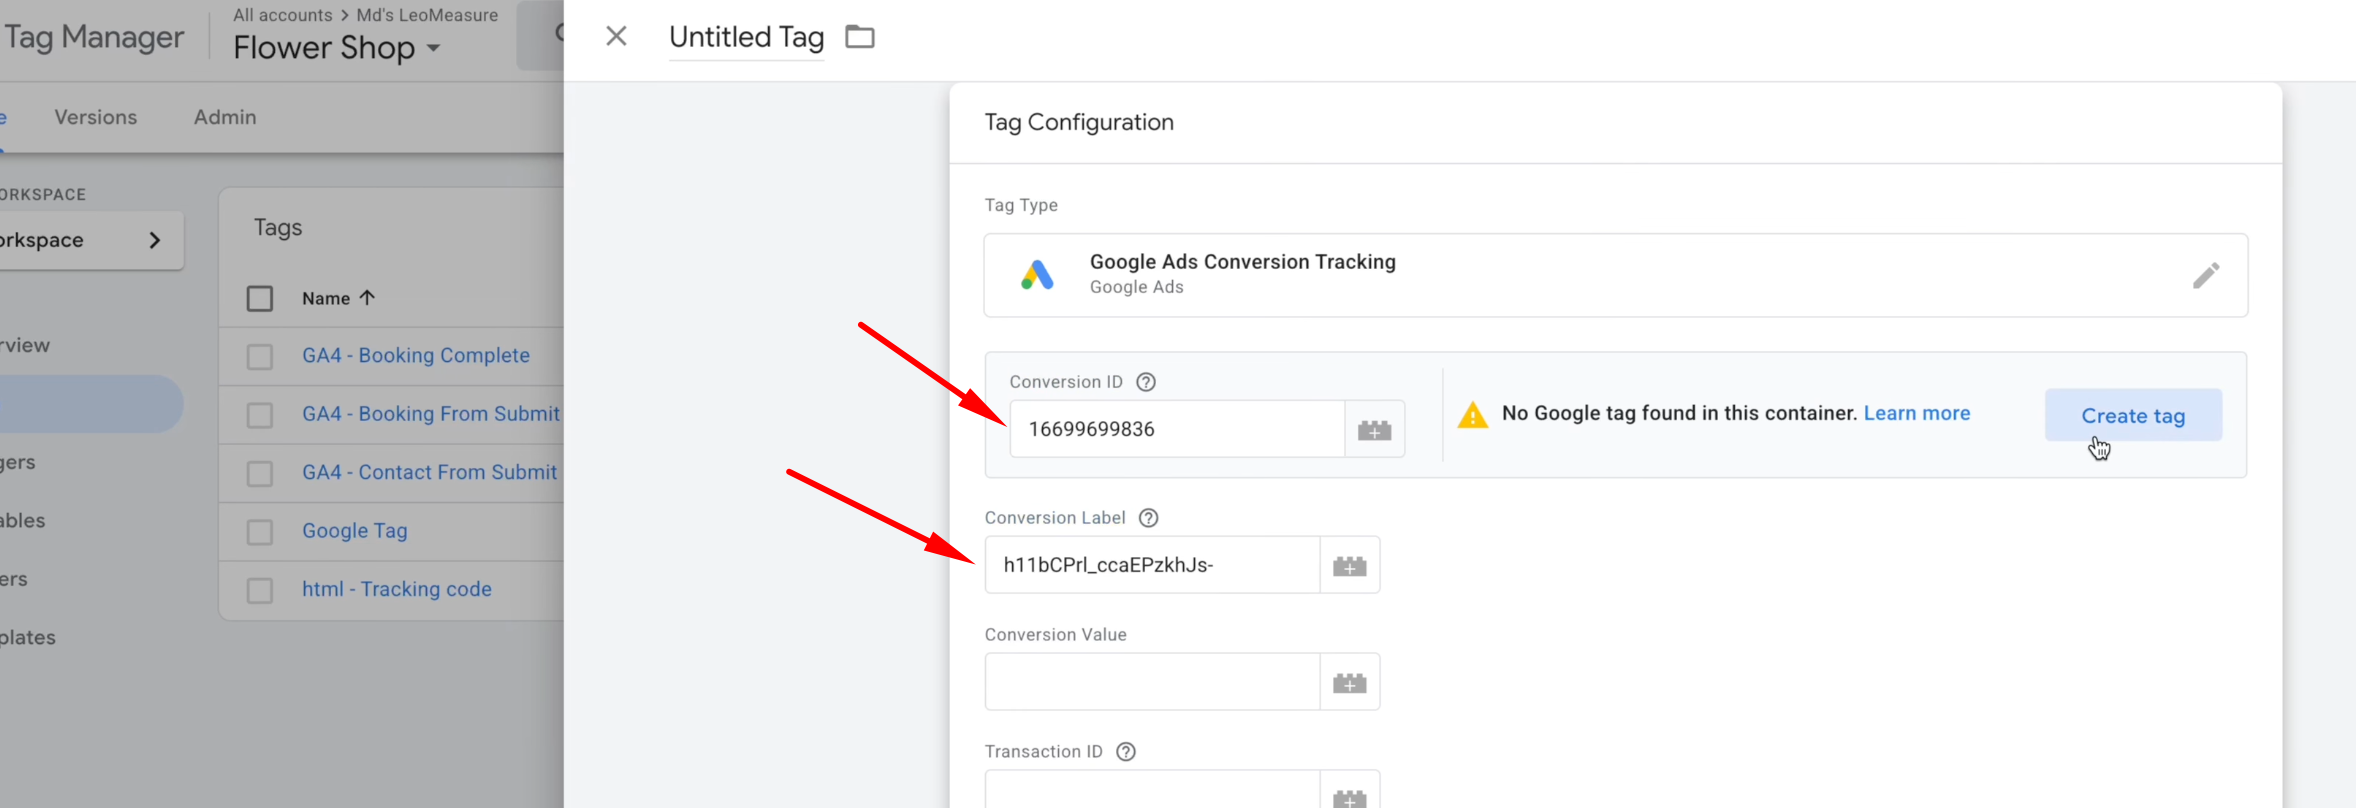
In the Tag Configuration settings, select the tag type as “Google Ads Conversion Tracking”.
Now, go to your Google Ads account, create a new conversion goal, and copy the Conversion ID and Conversion Label. If you don’t know how to create conversion goal on Google Ads account you can take help of your marketer or LeoMeasure team.
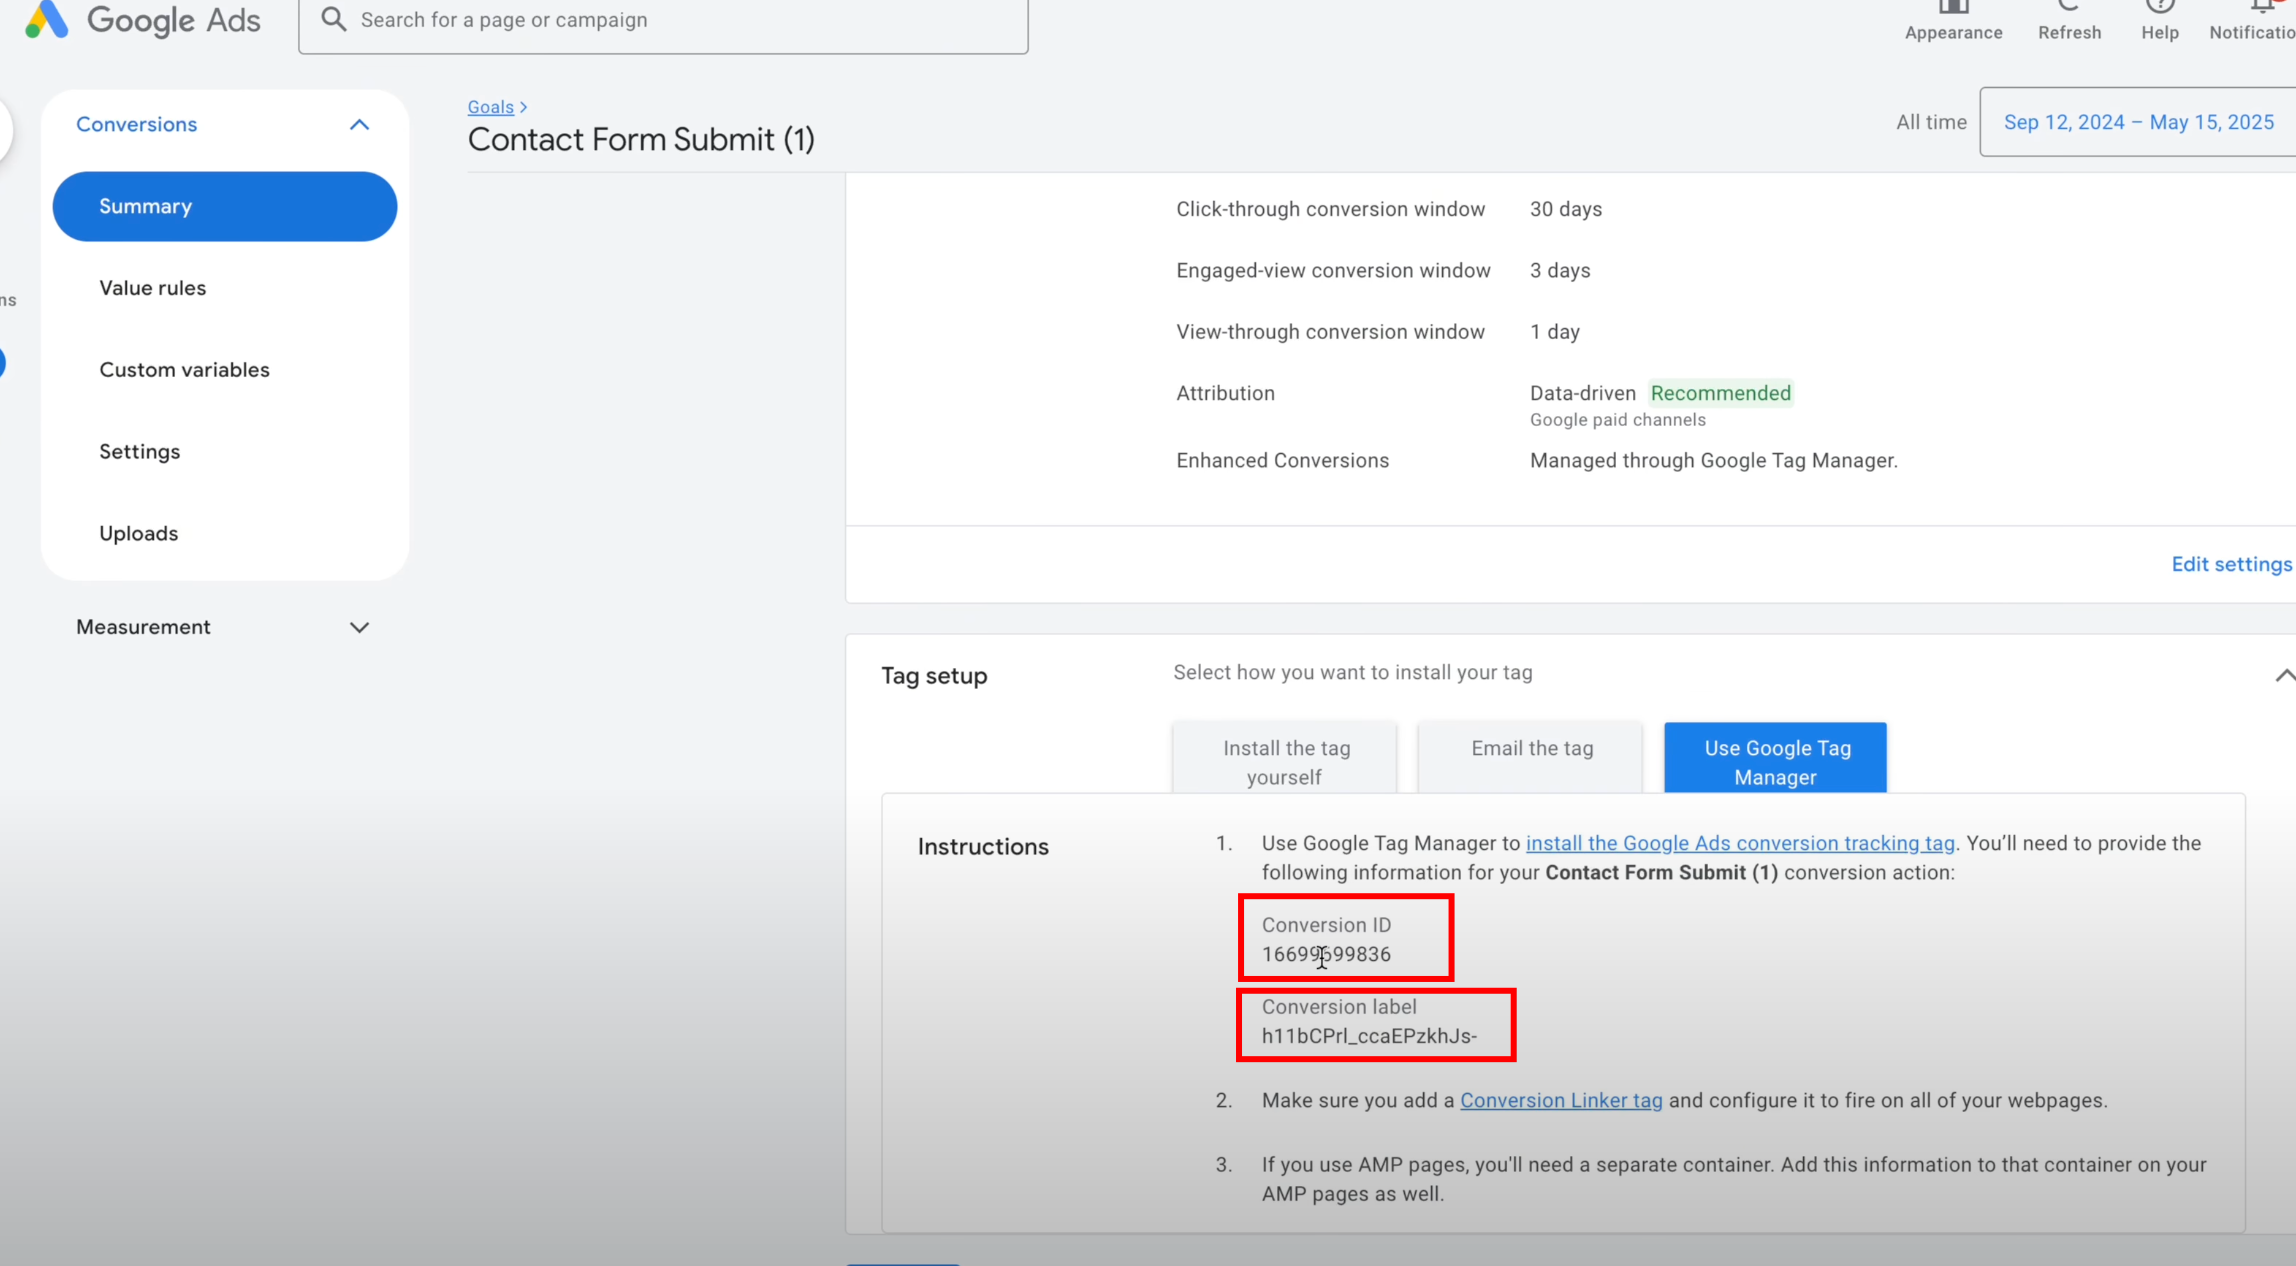
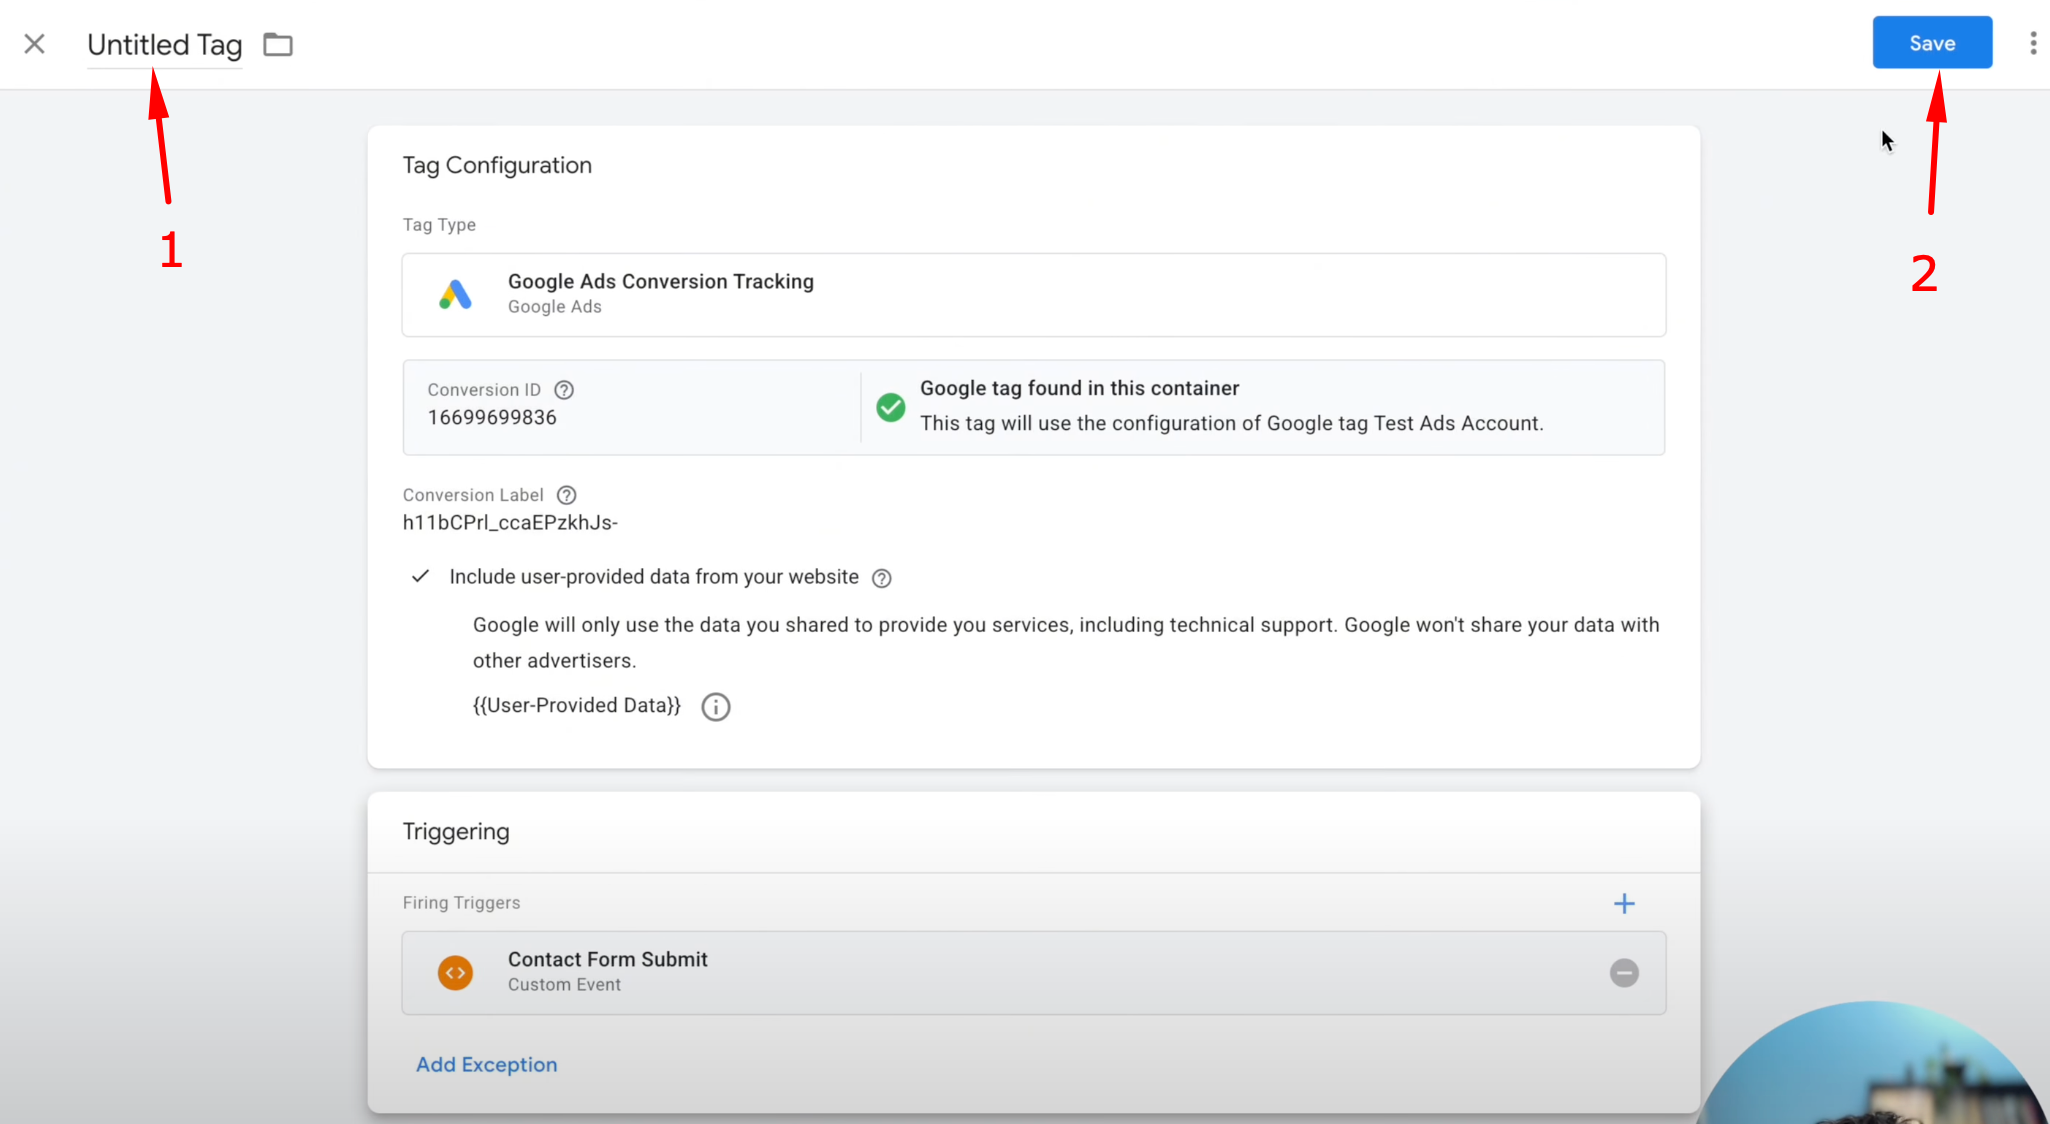
In the Google Tag Manager tag configuration section, enter the Conversion ID and Conversion Label that you collected from your Google Ads account.
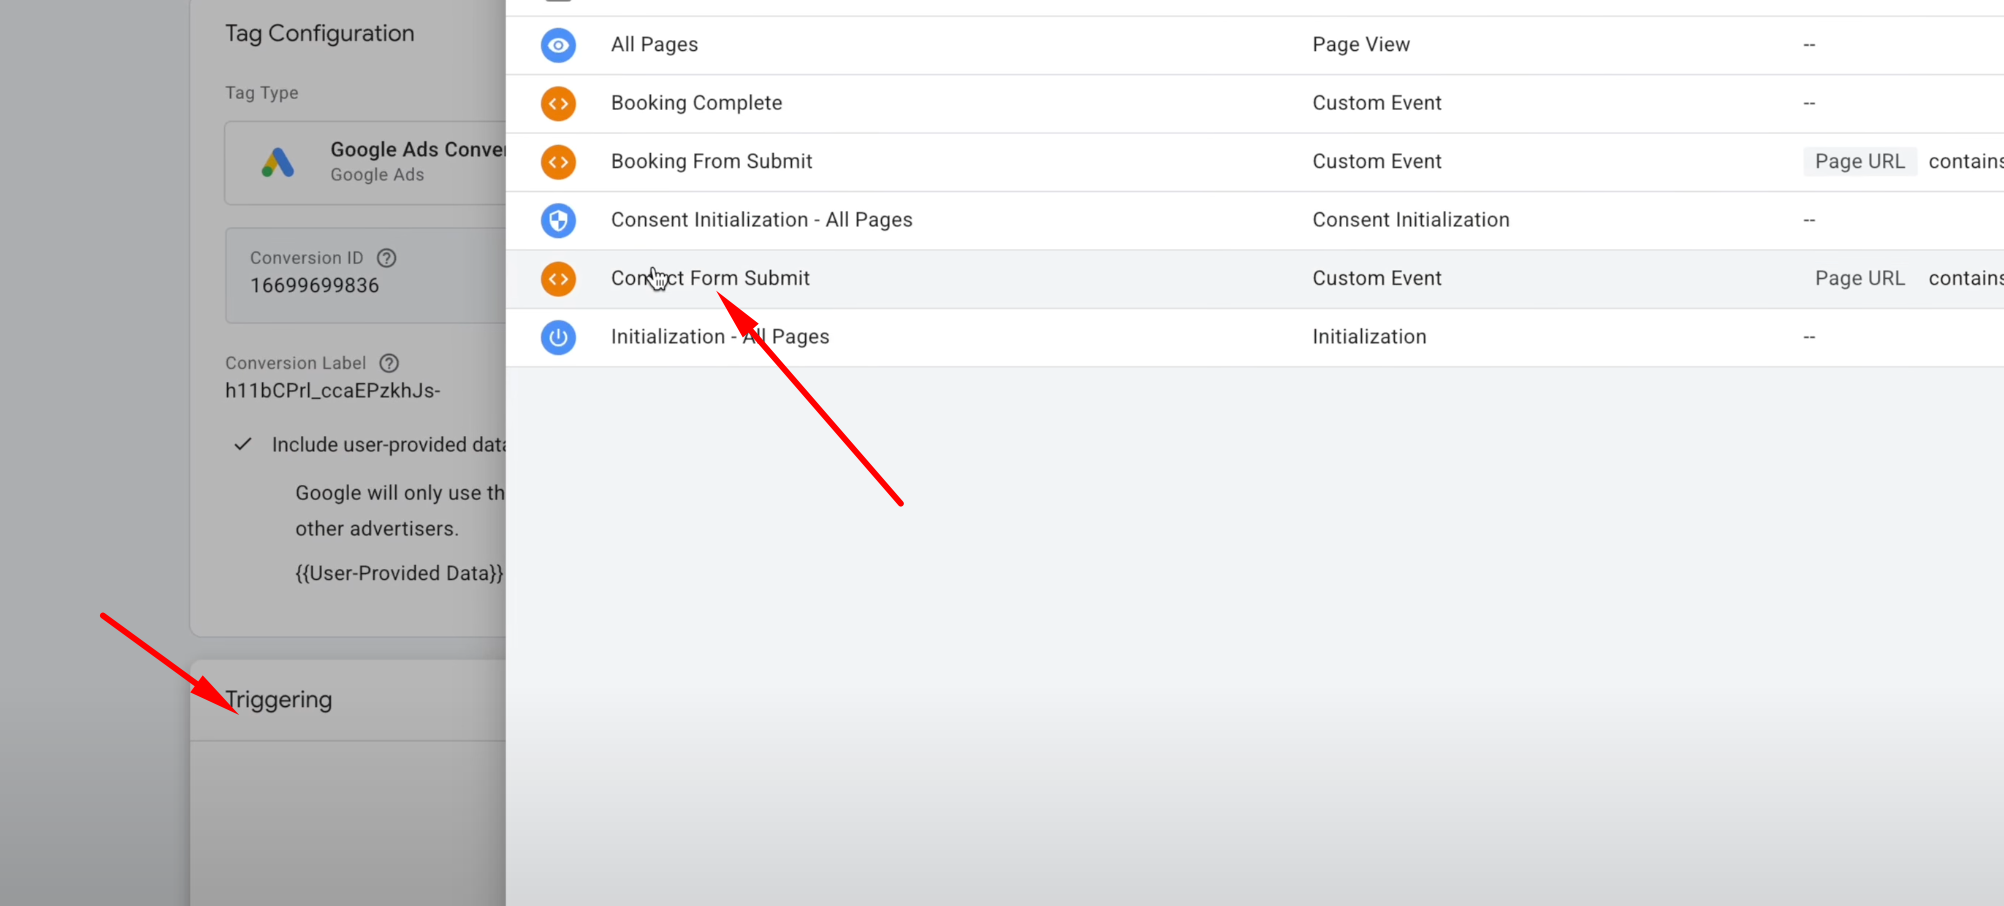
For the trigger, select the previously created “Contact Form Submit” trigger.
Now you can give a title as “GAds – Contact Form Submit” for the tag and Save it.
Finally your google Ads tag should look like this screenshot.
Step 3: Google Ads Tag Setup Testing
To test the Google Ads conversion tag, use GTM Preview as we did before.

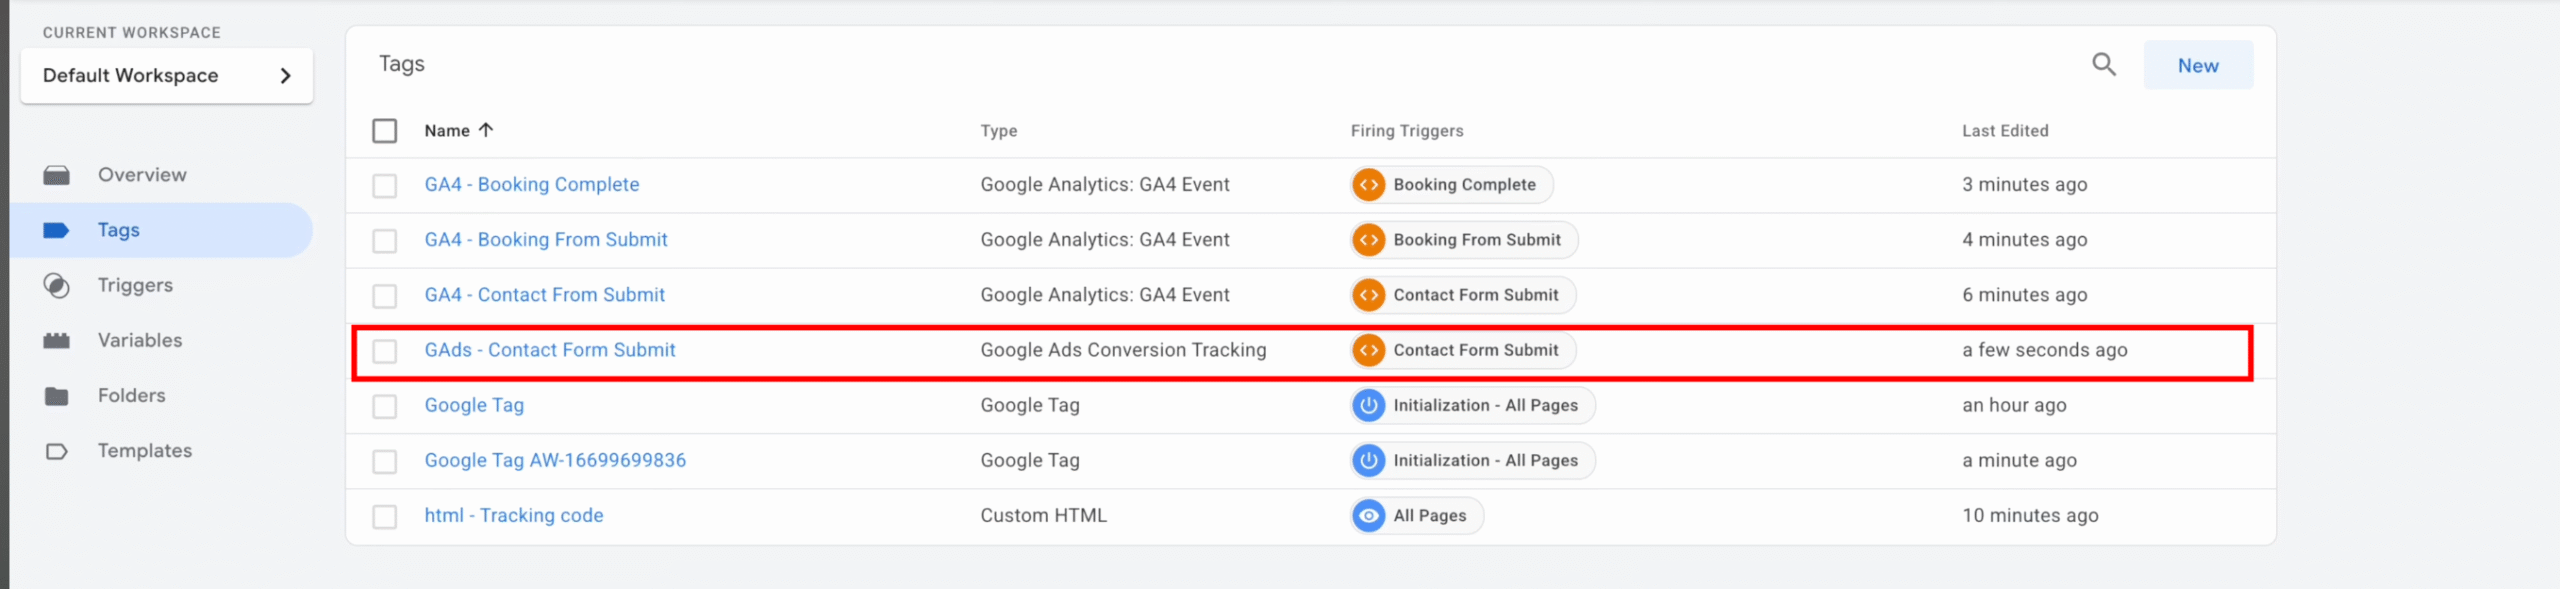
In the GTM Preview, you should see the tag fired as “GAds – Contact Form Submit”.
Finally, you need to submit and publish your tag.
FAQ for GoHighLevel form tracking with GTM, GA4, Google Ads
Why is tracking GoHighLevel forms difficult using standard Google Tag Manager (GTM) methods?
GoHighLevel forms are embedded as iFrames, meaning they are essentially a “website within a website.” Standard GTM listeners on the main page cannot directly see or communicate with content inside this isolated iFrame due to browser security restrictions (the Same-Origin Policy). This isolation prevents built-in GTM triggers like “Form Submission” from detecting the event.
Can I track appointments booked via the GoHighLevel Calendar form?
Yes. GoHighLevel’s booking forms are also embedded via iFrame and use a similar submission mechanism as the lead forms. The same custom tracking code methodology is used: listen for the post-message confirmation from the iFrame, push a distinct custom event (e.g., ghl_booking_complete) to the dataLayer, and use this event to trigger your GA4 and Google Ads tags.
Final Thoughts
This was a detailed, step-by-step tutorial on GoHighLevel Conversion Tracking. For enhanced conversion tracking, you’ll need to use user data, create variables, and send this information to Google Ads or your preferred tracking platform.
If you get stuck or need assistance with Google Analytics or conversion tracking setup, check out more tutorials on the LeoMeasure Blog or reach out to our team directly — we’re here to help!